Elegant sand and sea ensuite renovation

This elegant sand and sea ensuite renovation was one that has been 10 years in the making. Ever since we bought this log home, this bathroom has been on the priority list. Unfortunately, the priority list was very loooonnngg and it took this long before it finally made it to the top.

To read my previous post about the start of this renovation, click here.

Entrance to principal bath
Ensuite bath after

I guess I shouldn’t say this for modesty sake, but it turned out even better than I had hoped! The difference between the before and after photos are quite shocking, if I do say so myself.

Ensuite bath before
Ensuite bath before

This bathroom had been quite a beautiful one in it’s day, 30 years ago, but now it was definitely showing it’s age. While I can appreciate what was probably an expensive accent tile at the time, I was a little over the green and pink calla lily motif. Not to mention the green grout everywhere!

Over the past 10 years I had envisioned what this bathroom could become. With large scale natural tiles with movement, a simple sleek tub and a much more streamlined vanity.

Elegant Sea and Sand Ensuite bath design board

This was my design board for this renovation. Everything had to work with the partial log wall and the pine ceiling. So I wanted it to have natural elements but still be quite modern and elegant.

Warm and cool metals

As you can see I mixed warm and cool metals. This mixture was for a few reasons:

  1. Polished chrome is a classic finish that doesn’t date, wears well (with hard water that is a big consideration) and is also easy on the budget. So the sink faucets, the tub filler, the shower kit, the floor mounted tub filler and the shower trim are all shiny and sleek.
  2. I also wanted to bring in some warm metals to relate to the warm tones of the wood, so I was happy to embrace some brass tones, with the lucite and gold handles, the brass track light fixture, the mirrors and the sconces.
  3. I love mixing my jewellery metals and have always felt that mixing cool and warm metals in a room, just makes it that much more interesting. The key to mixing metals is to have both metals repeated at least twice in a space, that way it looks intentional.

We kept all the plumbing in the same place as the layout worked well and we didn’t want the extra expense of moving plumbing around.

Shower

The shower was a good size and in a good position. So we just added the triangular shower bench from Schluter, which was the perfect size and shape.

Ensuite shower
Elegant sand and sea ensuite shower after

Originally we were just going to reuse the shower glass but there was a small accident when dismantling them when one of the pieces shattered. Just so glad it wasn’t me!

The new shower glass was an unexpected cost and it took many months to actually get it measured and installed, but it turned out as these things often do, for the best. The new glass configuration is so much sturdier and has a much tighter seal, so no water on the floor!

We have a similar river rock shower floor in another bath here which has held up very well, so it was a no brainer to do it again. I love the natural look and feel these flat river rock tiles give the shower. Not to mention that they are very soothing to stand on.

Shower bench and river rock mosaic floor
Flat river rock mosaic shower floor
Sand and sea ensuite shower
Elegant sand and and sea ensuite shower

The previous shower had done well for it’s 30 years but the grout had cracked and tiles were starting to come away from the wall. The glass door was shaky and the shower floor tiles just would not become white again, no matter how much you scrubbed (thank you hard country water).

Ensuite shower before

Tub

A freestanding tub and a floor mounted faucet were a dream of mine, and this bathroom allowed me to have both. The tub is amazing, it is so comfortable to sit in. Not quite as deep as it looks, this tub easily fills with hot water, and does not drain our hot water tank! It even has a little ledge to perch a glass of wine (insert heart emoji here).

Ensuite bath freestanding tub
Elegant sand and sea ensuite bath with freestanding tub

We rarely used the old tub as it took so much hot water to fill it, that you ended up sitting in a lukewarm bath.

Ensuite whirlpool tub before
Whirlpool tub before

Vanity

The new double vanity was an online purchase (as we were in the midst of a covid lockdown). It ended up being a great selection. It was delivered right to our country home, right on time. It super sturdy in solid wood and painted in a beautiful classic navy. The big bonus was that it came with the marble countertop, sinks and even a backsplash. All definite pluses in Covid time.

Ensuite bath double vanity
Elegant sand and sea ensuite bath navy double vanity

It did come with very basic nickel knobs which I managed to replace with these gold and lucite handles. Another online purchase which worked out very well. It was tricky finding 3″ centre pulls that had smaller knobs or pulls to match.

They just elevated the vanity to the elegance I knew it could have.

Lucite and gold pulls

The previous vanity was still in decent shape but the chipped sinks and tarnished taps were not. Also the makeup area was pretty useless. It had a mirror attached inside for makeup application but the mirror ended up pointing towards the floor so it was not useable. I ended up using it to just store my makeup.

Ensuite bath before
Ensuite vanity before

Fixtures

I love cross handled faucets, and again this was the perfect opportunity to use them. Sourcing the fixtures took time as I had a big list of wants:

  • polished chrome,
  • cross handled faucets,
  • floor mounted tub filler, and
  • sleek shower fixtures.

Sourcing began by finding the floor mounted tub filler and lucky for me, other pieces worked as well.

Delta Stryke floor mounted tub filler
Delta Stryke wide spread cross handled faucet

And I found them all in Delta’s Stryke line. It was modern but still a bit traditional with the cross handle option. It also had great looking towel bars and toilet paper holders.

Free standing tub and Delta Stryke floor mounted tub filler
Delta's Stryke shower kit with cross handles
Shower kit with cross handles
Delta Stryke wide spread faucets with cross handles

Toilet

Entrance to principal bath
Elegant sand and sea ensuite toilet

We switched the toilet to a more streamlined one. It uses less water and its enclosed base makes it much easier to clean.

Floor

Last year, I received an email from one of my tile suppliers announcing some new tile lines. As soon as I saw it, I told my husband, I think I’ve found our bathroom tile. It was exactly what I had been picturing in my head. I quickly ordered some samples and once they came, I knew I had our winner.

I selected the polished tile for the wall and the matte finish for the floor (more slip resistant). They are 24″ x 24″ and absolutely beautiful in person.

Ensuite vanity and tub
Ensuite vanity and free standing tub area

The previous floor was heated (amazingly done 30 years ago) and it spoiled us, so we decided to put it in again but this time with a more energy efficient system.

Lighting

The new lighting included an LED brass track light (damp rated), which was a little difficult to find. We wanted to use a track light again as the electrical was through a wood beam. As we have discovered, electrical in a log home can be very tricky and expensive to relocate.

The nice thing about track lights is that you can point the heads where you want the light to shine.

Brass LED track lighting
Brass LED track lighting over the shower

The sconce lighting was a little easier to choose. I had just ordered the lucite and gold pulls, so as soon as I saw these sconces I knew they would be the perfect match.

Vanity area with sconce lighting

The lighting in this bathroom previously was not good. The shower track lighting is the same throughout the house and for some reason the heads decide when and if they are working. Very strange and very annoying. I had replaced the over the mirror hollywood strip with the black uplights when we first moved in. These were a stop gap measure until we did the full renovation.

Vanity lighting before

Mirrors

Gold framed mirrors and gold and lucite sconces

We went back and forth about keeping the large custom mirror. I really wanted to put eye level sconces in, as that is the best lighting for bathrooms, in my opinion. I thought perhaps we could cut into it to place sconces on the mirror. But I knew doing that would likely crack the mirror.

Ensuite bath before
Ensuite bath before

In the end, we decided to take it down. The plan to reuse it in our home gym, was dashed when it sadly cracked in half when being moved. Now I’m very happy with our decision to put up two gold framed mirrors. We don’t miss the larger mirror at all.

I found these mirrors, early on in the renovation, at Home Sense. Since there was talk of a lockdown, I bought them just in case. Very glad that I did that, as that is exactly what happened. I thought I might replace them once stores reopened, but we’ve been quite happy with their warm understated look.

Vanity area
Elegant sand and sea vanity area

It thrills me that after a few months of using the bathroom, we are still enjoying it so much. Every time I walk into it, I pinch myself as it feels like we are staying at posh resort! How lucky we are!

Sand and sea ensuite
Elegant sand and sea ensuite
Sand and sea ensuite tub area
Elegant sand and sea ensuite tub area
Sand and sea ensuite
Elegant sand and sea ensuite

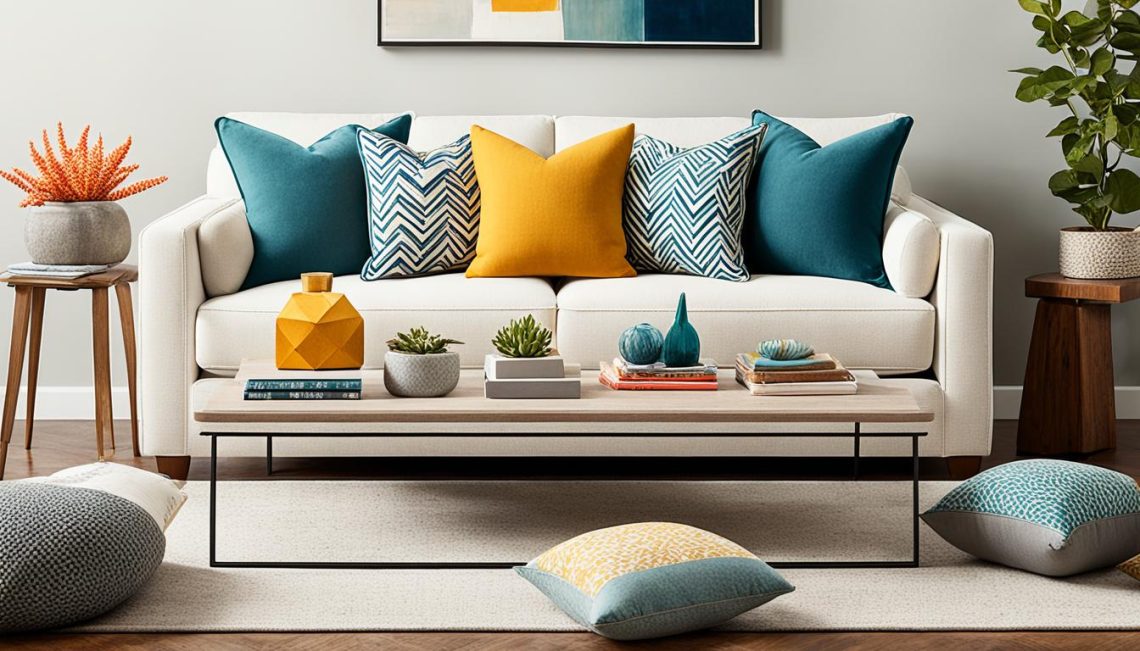
Throw pillows 101 – or how to coordinate pillows

How is everyone doing? Here we have been fortunate to have some amazingly warm weather and bright sun. Which of course makes my thoughts go to Spring. And then they go to switching up my throw pillows. So how about some throw pillows 101 to get you in that spring mood.

How to coordinate throw pillows
Throw Pillows 101

To coordinate throw pillows, the first step is to pick at least three fabrics.

  1. A solid fabric
  2. A pattern – pull your colours from this fabric. It can be a small, medium or large scale print
  3. A graphic – small, medium or large scale print, should not be the same scale as #2.
  4. If you go with a fourth fabric, it can be any of the above three but if patterned, the scale should be different from #2 and #3.

Then consider the fabric’s texture, linen, cotton, velvet, knitted, faux fur, embroidered, etc… as well as the size and shape of the pillows. Vary these to great effect.

I started with the floral as it had the colours I was looking for, including a neutral that works with the sofa fabric. Then I pulled colours from that fabric.

Throw pillows 101
Floral pattern first, choose other colours from this pattern.

I chose a velvet in the background colour of this first pillow. The result is good as you can see above, but not as interesting as adding a third fabric.

Throw pillows 101
Second and third fabric selection

I pulled out the yellow in the floral pattern, but did it in a graphic print. In this case the floral fabric is a medium scale and the yellow fabric is a large scale. I could have also gone with a small scale graphic print, something like a polka dot which I considered but this fabric was a better colour match to the floral pattern.

Coordinating fabrics for throw pillows

Then I made another smaller pillow in the floral pattern. And with that last pillow the sofa is done.

Coordinating fabrics for throw pillows
Three coordinating fabrics for throw pillows.

You can switch up the positioning of these pillows but I usually gravitate to putting the solid at the back and the prints in the front.

Hope this helps you to bring a little spring freshening up to a sofa near you.

Sand and sea ensuite bath

Like a lot of you, we’ve been spending some quarantine time working on beautifying our home. This year, our log home’s ensuite bath made it to the top of the priority list. I have had this particular image of it in my design brain for a long time and finally, the sand and sea ensuite bath update has begun.

My husband actually started demoing it in the late fall as he was planning on doing most of the work himself. Which is great and horrible all at the same time. Great, in that we save some money on labour and can therefore spend more on products. Horrible, in that we’ve been living and sleeping in a construction zone for almost 4 months now. I’m so over all the dust and dirt.

Here’s the game plan, so I’m trying to keep my eyes on the prize.

Sand and sea ensuite bath design board

And she’s is coming along. Here’s the latest pictures I shared on FB and IG. The floor and wall tiles are all done and grouted. We’ve put some of the wood trim back up, with a little more to go once painting is done.

Sand and sea ensuite bath

A close up of the river rock shower floor.

Before

And just so you know what we have been living with for almost 10 years, below is the before of the bathroom. It’s not a bad layout and it certainly is not small so we were lucky to have these good bones. As you can see from the previous photos we’ve kept the same footprint and will just be replacing all the 30 year old fixtures.

Before - ensuite bath
The ensuite before circa 1992

What’s next

We are having some drywall repairs done this week and then we will be painting and setting up a time for the plumber to install the free standing tub, the toilet, sinks and shower fixtures. I CAN’T WAIT!

We will also have the glass for the shower enclosure measured and manufactured. We did want to reuse the existing glass but sadly a piece did not survive the removal. Not too sure how long that will take, but with all the covid delays, I’m thinking using the shower will still be awhile away.

I’m also waiting for the light fixtures to come in, hopefully this week or next.

I’ll be sharing more details on how this design evolved and why I made some of the selections I did, in future posts. And I have a little project I want to do as an accessory for the tub. Stay tuned….

Also if you would like to read more about our log home renovations that we have been doing since we purchased it 10 years ago, you can click these links below:

Log cottage kitchen transformation

Designing and furnishing a sunroom

Designing a modern cottage bath on budget

Log cottage living room on plan and budget

Log cottage dining room update

Log cottage published!

Adding a three season sunroom

Hello everyone! It’s been awhile. I’m not sure about you, but for me, it’s been hard to get motivated lately. So in the interest of focusing on something else, besides Covid, I’m sharing my three season sunroom plans.

The dead of winter is really the ideal time to make exterior design plans. Like so many of us, I’ve been focusing on my home. So I’ve been playing with our backyard design for the last few months. And we’ve just taken the first step towards getting a functional and oh so pretty backyard.

Our bungalow model, has a small covered area at the back. As soon as we saw it, we pictured a three season sunroom.

Here’s a couple of my 3D renderings showing what I’ve come up with so far.

Three season sunroom rendering
A bird’s eye view

It’s the area at the top left corner in the floor plan below. (Our house is actually the reverse of this plan. Click here to see more about our bungalow.) As you can see it’s very tiny. About 9′ x 9′. Just enough room to have a few chairs, maybe a couple of ottomans, and a small table.

Bungalow floor plan

Construction starts this spring! We’ll have it enclosed by adding a deck floor and then putting in Weatherwall windows and a door. I haven’t used these types of windows before but they are perfect for this application. They are clear heavy gauge vinyl that will spring back to shape if pushed on. The four section windows open by stacking up on themselves.

Below is an inspiration photo we saw when driving around town one day. Our windows won’t go to the floor though, as we will be putting some sort of siding at the bottom.

Inspiration photo of three season sunroom

Our existing windows, doors and roof are all black, so we will be keeping it harmonious and doing the same with the sunroom. With the tiny wall area in the sunroom, I’m leaning towards installing black horizontal siding inside and out. I haven’t completely decided on that yet, but I think it looks pretty darn good in my 3D renderings above.

Exterior bungalow
Front exterior of our bungalow

This is just the first phase of the backyard project. We are planning to add a hot tub, two level deck, fencing and a pergola over the next few years. Having a long term plan is crucial when doing any type of construction in stages. You can have a tiny peek of what I’m thinking in my renderings above. It’s a tiny yard, so I want to make it functional, pretty and very, very low maintenance.

Yet another reason to look ahead to spring!

WARM GREIGE PAINT COLOURS – MY 6 FAVOURITES

If you, like the rest of us, have a lot of free time on your hands, you may be planning on painting some rooms in your home over the winter. And if you like, a lot of my clients, have a home that has some beige fixtures and are struggling to add some cooler tones that will update and work with the existing flooring, counters, cabinetry, here are a few of my favourite warm greige paint colours that you can try. 

As always, with paint, painting a board with your paint selection and testing it on a few walls at different times of the day and in different lighting is strongly advised. Paint colour is subjective and is greatly influenced by surrounding light, colours and fixtures, and this extra step will ensure you are thrilled with your results.

If your home is dark and you want to lighten and brighten, these paint colours are a great starting point to find the perfect hue for your home. 

I’ve also done up a little cheat sheet that you can download and keep for future reference.

These are the colours that I go to, time and time again. This first one is my favourite and most used paint colour:

1. Benjamin Moore’s Revere Pewter – HC-172 

A true chameleon this colour is very subjective, it can look green, blue, grey and beige depending on it’s location. Testing is essential with this one.

It is a warm grey paint that marries well with warm toned flooring, tiles and counters. I have used this colour for many clients, and myself and we’ve all been thrilled. 

warm grey paint colours
Revere Pewter

This is a corner of my principal bedroom at my log home with Revere Pewter on the wall. This is a true testament to Revere Pewter’s compatibility. All that orangey pine and the paint colour just cools it down a touch. To read more about my log home and it’s many updates and renovations, you can click here.

2. Collingwood OC-28 

This greige paint, again with warm and cool tones, is somewhat softer than revere pewter. However, Collingwood is a tad more warm than cool, so it is a great one to use to avoid a blue toned grey.

warm grey paint colours
Collingwood

This was a client’s office that I did a few years ago and Collingwood worked perfectly with the warm greys of the file cabinets and the oak flooring. With this colour, the artwork popped against this background colour. 

3. Fossil AF-65  

Fossil typically reads more beige on the wall. With its touch of grey and pink, it is a great one to use with beige/pink fixtures. I used it below in my sunroom to cool down my beige/pink floor tiles. You can read my post about updating my previous home by clicking here.

warm grey paint colours
Fossil

4. Wish AF-680

Wish is a soft, warm grey. Its warmth works well with earthier tones and it updated my office, even though it had dark brown furniture and a taupey rug.

warm grey paint colours
Wish

5.Thunder AF-685 

I would call this the big brother of Revere Pewter. Darker and with more grey than beige, Thunder still feels like a neutral warm paint colour. Ideal to use with existing warm finishes to update them without feeling too cold. 

warm grey paint colours
Thunder

 I have found that this colour brings out the gray tones in brown granite countertops, like this one shown below.

warm grey paint colours

6. Picket fence  CSP-370

This colour is in Benjamin Moore’s Colour Stories palette, which is available only in the Aura line of paints. It is a beautiful neutral grey.

I loved Picket fence so much, I painted it throughout the main rooms of my previous home. It feels calm and has a wonderful depth to it. It is quite similar to Collingwood and Balboa mist. 

warm grey paint colours
Picket Fence

Here it is in my previous laundryroom with it’s cherry toned cabinets and pinky beige tiles. And it also worked with a faux black granite countertop, by pulling out the gray tones in it.

I hope this helps to start you on your painting journey.

Happy Painting!

Transforming previously loved furniture

I love a good furniture transformation. I find it so rewarding to transform previously loved furniture and make it my own.

It’s also very economical as typically the piece itself is either free or costs very little money, compared to a brand new piece. And the added extra bonus is that older furniture tends to be better made with more solid wood pieces than what you can buy currently.

This past summer, I went with my husband to the cottage dump and found this little tub chair. I immediately went to check it out as the tufting caught my attention. I also was also in need of a small scale chair for our new home.

Before vintage wicker and wood, upholstered tub chair
Before vintage wicker and wood upholstered tub chair

I made sure the wicker was in decent shape as it is hard to find someone to repair wicker. I’m sure you’ve seen this type of chair before as it’s a very popular design.

I plan to sand, prime and then paint it a soft old gray. I’ve selected this beautiful dark teal velvet to reupholster it with. And then accessorize it with a soft light gray faux fur pillow.

teal velvet and light gray faux fur

I am not sure where it will live in our new home, but perhaps the bedroom or the entry. Time will tell.

I’m really hoping it’s warm enough this week to prime and paint it in the garage. Fingers crossed.

Have you transformed previously loved furniture? I’ve done quite a few over the years. These are just a few of the chair ones that I’ve posted about.

I did this chair quite a few years ago, but it’s a favourite . It still lives nicely in my family room.

These two chairs were left behind by the previous cottage owner and I added a bit of height to them and reupholstered them for a completely new look.

My son and son-in-law redid these chairs that were my dad’s into extra living room seating for their home.

And more recently, I had the cushions on these wicker chairs redone to give them a fresh new look.

There are lots of ways to repurpose, reuse and recycle old furniture. Once my chair is all done, I’ll be sharing the reveal!

Modern and masculine bath

Hello, everyone! I’m finally back to my blog. I’ve been gone so long that WordPress has a completely new update…yikes. But enough about that, let’s get to some design inspiration. How about a modern, masculine, black and white bath?

This bathroom is actually in my son’s and his husband’s home. They came to me last summer when they had a serious leak which pushed the bathroom renovation up to the top of their priority list.

Justin, my son-in-law had already done the hard work and had a very good idea of what they wanted. So I just brought them samples, they quickly agreed on the final selection and once we had the contractor on board, we were ready to go.

This is what we were dealing with before.

Before- Modern,masculine bath
Before
Before modern bath renovation
Before

As you can see it is a tiny bathroom, or as they like to say it’s very quaint bathroom. And it’s their only full bathroom. So, we made sure that all items were on site and ready to install as soon as our contractor was ready to start. That way no downtime. Having them go on a vacation while it was being done was also fortunate. And they came home to a new, leak free bathroom.

Modern, masculine bath

They had recently replaced the toilet so that remained. The vanity is from Ikea and came with the sink and a bamboo counter. The bamboo wasn’t quite what we wanted so instead we picked up Ikea’s butcher block counter and had it cut to size by our contractor. Justin already had the shelf brackets so we just had the excess butcher block cut for the matching shelves.

Modern, masculine bath
Lighted mirror and shelf for modern, black and white bath

The lighted vanity mirror and the black faucet were found at a big box store.

Detail of shelf
Modern, masculine, black and white bath
Wood accents coordinate with wood floor
Modern, masculine, black and white bath

I love that the wood accents pick up on the wood floor and banister right outside the bath.

Black and white modern bath renovation
Black and white modern, masculine bath

The hexagon floor tile was something that they knew they wanted from the start. It looks amazing and has a little old world feel which is perfect for their almost 100 year old home.

Modern, masculine bath

The new tub has an updated square profile and the subway tiles are slightly oversized for another modern twist. Dark grout makes cleaning a little easier and the shower door’s barn door hardware picks up on both the grout and the floor.

A new window was installed since this was the ideal time to ensure it was watertight and energy efficient.

Vintage details in bath renovation
Vintage vent

I love the juxtaposition of the new black hexagon floor with the vintage vent. So much character!

Here’s a few more photos of the space.

Modern, masculine bath
Black and white, modern, masculine bath
Black faucet on Ikea sink and vanity
Modern, black and white masculine bath
After - Black and white, modern, masculine bath
Modern, masculine bath

We are all very happy with the outcome. How can we update your bathroom?

Serene ensuite bath

Serene master bath

My clients’ serene ensuite bath is finished! They are thrilled! No more sharing their children’s bathroom. 🙂 It’s perfectly spa like with soft blue grey walls, a luxurious soaking tub, large shower stall, carrera look tiles and a wood finish vanity.

Serene master bath
Serene master bath - vanity

Shower area

We kept the bathroom’s layout as it was functional and very budget friendly. The shower area is now square and fitted with a custom glass enclosure. As my clients are on a well and have hard water we chose a medium toned grey mosaic tile for the shower floor. It will help hide any future staining.

Serene master bath - shower

Large scale white subway tiles with a glossy hand finished quality to them line the shower walls. These tiles are stunners in real life and very easy to clean with their minimal grout lines. The water fall shower head completes the luxurious feel of this shower.

Serene master bath
Before - master bath shower
The shower area before

Tub area

The beautiful soaker tub now takes centre stage in the bathroom. It’s simple tulip like shape fills in the space and the floor mounted bath tub filler is like a little piece of sculpture in the room.

Serene master bath - freestanding tub
Serene master bath - tub area

And with that gorgeous view outside, who wouldn’t want to soak in here for hours?

Serene master bath - freestanding tub
Before - master bath tub area
The tub area before

Vanity area

Serene master bath

The vanity area is completely updated with a contemporary wood finished double sink vanity. Complete with quartz counters and square double sinks it is the perfect spot for sharing.

The carrera marble look porcelain tile flooring is the perfect blend of classic and low maintenance. Again the large scale rectangular shape means minimum grout lines to keep clean.

Before - master bath vanity area
The vanity area before

My clients originally had a toilet and bidet in this room. The decision to remove the bidet (which was only being used by the dog for his drinking bowl) allowed us to gain more space under the window. This allowed the toilet to move over slightly and give a little more breathing space at the vanity.

Serene master bath
Serene master bath - vanity

I am absolutely in love with the scale backsplash tile. We opted to do the whole wall for impact and to keep it soft and calm, we used a matching white grout. The fish scale pattern is perfect for a bathroom and it can be installed the opposite way to mimic a wave pattern.

Serene master bath - backsplash detail
Closeup of the backsplash tile

The round mirrors are contemporary and allow the backsplash to shine. And they coordinate with the rest of the bath’s chrome fixtures and finishes.

Serene master bath - backsplash detail
Serene master bath
Serene master bath

Are you in need of a bathroom renovation? You can check out another recent ensuite bath renovation here.

Give me a call and let’s start planning your dream bath.

How and where to place your tv

So, if you are like many other people you struggle with where and how to place your tv. The reality is most of us still have large televisions in our homes. Even if we spend a lot of time watching Netflix and Prime on our laptops. It can be a challenge to decide where it should go, living room? family room? den? And of course, where ever it goes, it dictates the furniture placement.

Do you put it centre stage in your room? But what about when it is off, and it becomes a big black hole in the room? Not typically what we all want as our room’s feature. Well for most women anyways, men can be fine with this. Lol

Sometimes, due to the size and shape of your family room or living room, it has to go above the fireplace. Not the ideal option, in my opinion and I struggled with this in our current new build. But sometimes, it is the only option.

I’ve listed a few methods here to help you disguise the big black box in the room.

  1. Hide it
    Well, at least part of the time. A media cabinet with either doors to close when not in use or one that is open with shelves, takes the focus off the television. This can also work for mounted tvs. A mounted cabinet can be built that allows for a decorative feature or artwork to show, when the doors are closed. And then there is these new tvs that look like art when they are not on. I just may be asking for one of these when our tv needs to be replaced. The Frame by Samsung is one that I have my eye on, pun intended 😉
  2. Make it part of a feature wall
    Aka ” If you can beat them, join them.”  Mount the television and then add a gallery wall of photos and art. By adding decorative pieces around it, the tv becomes part of the gallery.  I also like to use a dark media cabinet so that the tv and cabinet read as one piece.
  3. Blend it
    Paint or wallpaper the wall behind the tv in a dark colour. This makes such a huge difference. The big black box won’t stand out when it’s off and it’ll make for a better picture experience when it is on, as any glare will be reduced. This photo below is a client’s home showing how we wallpapered the tv wall in a dark colour to blend the tv and dark media cabinet. TV placement
  4. Embrace it
    By putting it above your fireplace, you make it part of the focal point. Make sure you get some guidelines from your television manufacturer since the type of tv and fireplace you have will dictate the specific clearances you’ll need. You’ll also have to keep in mind the distance between your sofa and tv, since optimal television viewing states that the tv be at eye level. This is not usually possible when placing it over the fireplace.

In our new build we have a very small living room on the main floor which will need to have a tv. Not a huge tv but a tv nonetheless. It also has only three walls, one that has a large, low window, one that has a fireplace with two windows on each side and then one long blank wall. So I went back and forth about whether or not to place the tv over the fireplace. Like seriously, back and forth, thinking about it at night, making a decision, then changing my mind.

We finally made the decision which I’ll share soon. I hope these suggestions help you in your quest to find the perfect place for your tv.


Downsizing 101 and basement plans

That’s right! We are downsizing and have purchased a new builder home that will be ready in a little over a year.

It’s a long time to wait, but it gives us plenty of time to get our ducks in a row such as, disposing and donating many items and it gives me lots of time to play with the exact design and decor I want for this new chapter in our lives.

QUESTIONS TO ASK WHEN DOWNSIZING

So if you are thinking of moving in the same direction or even if you are purchasing a condo or a smaller already on the market home, here’s some things to keep in mind.

Think about how you live or about how you want to live. Ask yourselves these questions.

How much space is needed for entertaining family and friends?

How many bedrooms or home offices are necessary?

Parking requirements

Ease of maintenance

Take the time to think about this and what your priorities will be for the next few years (we like to use 10 years in our plans). Write them down and compare them with your spouse or partner. It is so much easier to have a priority/dream list when you are out there looking for your next home.

For us, even though we are downsizing, we wanted a bungalow with a double car garage, space for two home offices, a guest room and an open plan for entertaining.

The layout we went with is approximately 1600 square feet without the basement. It has a very open layout with the kitchen, living room and dining room as one large room. This works well for us and when our large family comes to visit. There are two bedrooms and den in our plan and we will be converting the second bedroom to a second den. Click here to see our main floor plan from my previous post.

BASEMENT PLANS

Now onto the basement plans. This model’s basement comes partially finished with a family room and we will be completing it with a guest bedroom, exercise room and a full bath. This will give us lots of room to entertain and host family events.


Basement downsizing


We will leave the family room (or games room as it is called on the plan) will stay as it is. But we will be adding a gas fireplace centered on the back wall.

Bedroom #2 will be our exercise room and bedroom #1 will be our guest room, right beside the bathroom (which we are also keeping as per the plan). This gives us quite a bit of space for storage in the back room.

We want the family room to have a large seating area with a projector for movie watching. I also wanted a table with four chairs for games and hobbies as well as a large contemporary shelving unit for books and other items. I think we are bringing our pool table with us so that will take up a good chunk of the space.  It’s a little challenging to design as there is a post right centered about 8′ from the fireplace. I’ll be sharing a few of the design options in a later post.

One thing to mention about basements is that there needs to be alot of light. So make sure you think of that at this early stage. Our builder has placed quite a few pot lights in the space so I will be concentrating on supplemental lighting exactly where we need it.

So again, think about how you need the space to function and write your priority list. It’s a must!

NEXT STEPS AND WHEN TO HIRE A DESIGNER OR DECORATOR

Once you’ve signed on the dotted line for a newly build home, keep in mind that the questions and decisions will be coming at you fast and furious. It can be quite overwhelming.

Many major decisions need to be made quickly, so now is the time to hire a decorator or designer. They can walk you through these steps and give you some guidelines on where to spend and where to save. I’ve already made quite a few decisions, you can read some of them here.

Once you’ve decided on your new home and it’s layout, it’s time to look at your current furniture and ask these questions.

What will fit?

What do you need?

What can be multi purpose?

What can be reupholstered, repaired or painted?

I literally listed all my current furniture and then measured everything. I also thought about how it could be used (not only where it is used now). Keep an open mind about this. Lots of items can be repurposed. Downsizing can be liberating and fun!

Next post, I’ll be talking about exterior finishes and how to coordinate them.