From dark and drab to bright and pretty

Well, I can definitely smell fall in the air.  Makes me want to get all my cosy sweaters, leggings, tall boots and chai pumpkin tea out. It really is my favourite season, cool, sunny and not too hot.

As promised I thought I’d catch you up on some design projects that I worked on this past winter/spring.  And this ensuite bath renovation definitely brings to mind a fresh, bright, spring day.

Quite a bit of work has been done on this client’s home, as the previous owner used a wheelchair and there was some retrofitting that needed to be done for my client.  High up on the wish list, was her dark, brown and dreary ensuite bathroom.

Here’s the befores and I apologize for the absolutely terrible before pics. In my defence, it’s a small bath so it is very hard to get some good pictures but I think I accidentally deleted a few that actually were better than theses (shakes head).

img_9684edited img_9680

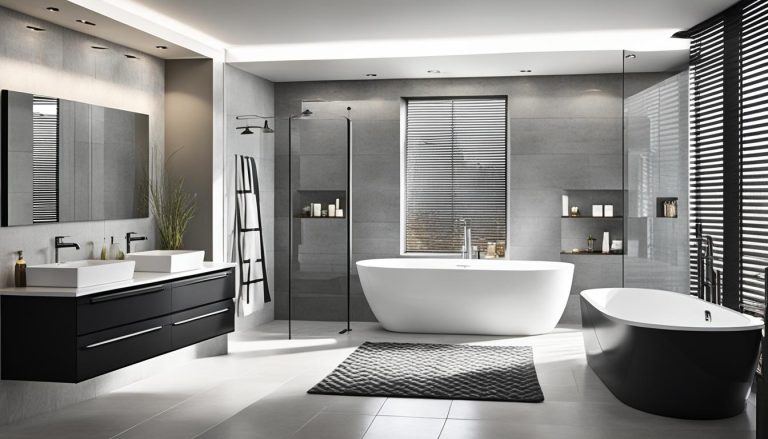
My client explained that she really wanted a white, clean, spare, spa bath with a freestanding tub and no shower (there’s one in the basement).

So, first up was removing the large brown walk-in shower.  I gave my client the exact measurements she’d need for a tub that would fit into small alcove (where the shower had been) and she was off shopping.  It was very important that she tried out the tub herself and made sure it was comfortable for her, tubs are like mattresses and seating, everyone fits in them differently.

And happily, she found the perfect one, modern, clean, oval and exactly the right size for our space.

c-vessovasquecontemporain-20150326-132034-0

Vanico Maronyx – Vesso

Isn’t she pretty?

Now it was time to find tiles. She loved the look of marble but with budget being an issue, I found some marble lookalike, large scale porcelain tile which fit the look and budget perfectly. We used them on the floor and then ran them up the wall about a third of the way, but just around the tub.

img_0405-2edited

Ceragres Anima & Onix Nature

When I came upon this pretty matte and  iridescence mini hexagon tile border, I had an aha moment. However, the large scale tile and the border tile were different thicknesses, but after adding in the chair rail moulding tile and pencil tile, it will never be noticed.

Due to budget constraints we decided to keep the existing white vanity.

4600_2400_1080

Caesarstone Organic white quartz

But upgraded to a new Caesarstone’s Organic White quartz countertop (above). Together with a simple white square undermount sink, shiny new Moen faucets and hardware you’d never guess it was the same cabinet. Feminine and sparkly!

ts42114

Moen Weymouth

We added the matching two handle tub filer from Moen, which really makes a statement in the small bath.

s22105

Moen Weymouth

Again, excuse the photos, I haven’t had it professionally photographed yet, or even photographed by me properly, but here’s a few iPhone pics of the after.  And yes we were still waiting for the new handles to be installed in this pic as well as for a small shelf above the toilet.

White. grey and yellow master bath

White, grey and yellow master bath tub

White, grey and yellow master bath detail

Quite a difference from the previous space, wouldn’t you say?  Bright and pretty, it’s the perfect spot to enjoy a nice soak.

Lisa

It’s finally finished

I have a finished powder room!


After living in this home for three years and hating the powder room, can you believe it was too big!  Just felt like a big cavernous hole especially with the puny pedestal sink.  Anyways, I made do for awhile by wallpapering a couple of walls (the wallpaper from Graham & Brown called Charming – that I blogged about last week) and changing the light fixture to a much prettier one.
Here’s the before pictures:

This last one shows the wallpaper from Graham & Brown.  Check out how Kelly’s used this wallpaper in her gorgeously finished master bedroom over at Design Ties.

But now, I think it is my favourite room in the house!!

So what did I do, well first I must give my hubby lots of credit as he did all the hard labour and had to sacrifice himself and go buy some new power tools – it was tough but he hung in there and finished it quickly! 😉   I was also trying to stay on a budget as we will have four children in university and college in the fall and we’re trying to be responsible parents.
A couple of months ago I found the perfect 1920’s mahogany dresser at an antique sale for the great price of $300.  I had been looking for one to convert into a vanity that was the correct size, shape and finish.   It looked like this when we got it.

Then I went looking for the sink and faucet.  Well I wanted an oval sink to mirror the bow in the dresser and I had wanted a bowl sink but the dresser was already 34″ high so I had to find something else otherwise as a vanity it would be too high.  After much looking I finally found a Kohler sink for that was oval, the right size and had about a 1 1/2″ lip to make it feel more like a bowl sink. Here it is:

Then the faucet, I originally wanted a more modern style faucet but I felt that since the sink, light fixture and wallpaper were quite modern that I should go with a more vintage feeling faucet to tie the vanity into the space.  Here’s the faucet I chose, a bit of a splurge but it’s beautiful – it’s a Showhouse (by Moen) and it’s called Waterhill in a chrome finish.


And the Waterhill matching toilet paper holder…so pretty!

Okay I have the two pieces that hubby needs to get started and here’s the work in progress. This is our supervisor Milo always at the ready to lend a paw.

Now him and hubby are discussing the plumbing and what needs to be done….
Any mice back there?
And here’s how it looks now!!
Here’s a close up of the vanity and the mirror that I found a Home Sense that was perfect. The photographs are mine from Paris (of course)….


Even Milo was pleased with the results and gave it his Paw of Approval!
I don’t know if you noticed but I didn’t stick with one metallic finish.  The light fixture, faucet, towel and toilet paper holder and glass shelf are all in a chrome finish.  The orchid bowl, mirror, vase (on floor), picture frame above the toilet and the medallions over the toilet are all in an antiqued silver finish.  Because the handles on the vanity are the original brass ones (which I didn’t want to change) and the wallpaper has an antique gold in it, I felt that bringing in some warm yellow tones would tie everything together.
And my budget, well it came in around $1200 which I think is pretty good.  That included the vanity, plumbing pieces, mirror, sink, faucet and accessories.  It doesn’t include my hubby’s new tools as apparently we needed those anyways!! 😉  Well, I’m so very, very, very pleased with the results and that I have one room in the house completed…..now what’s next????