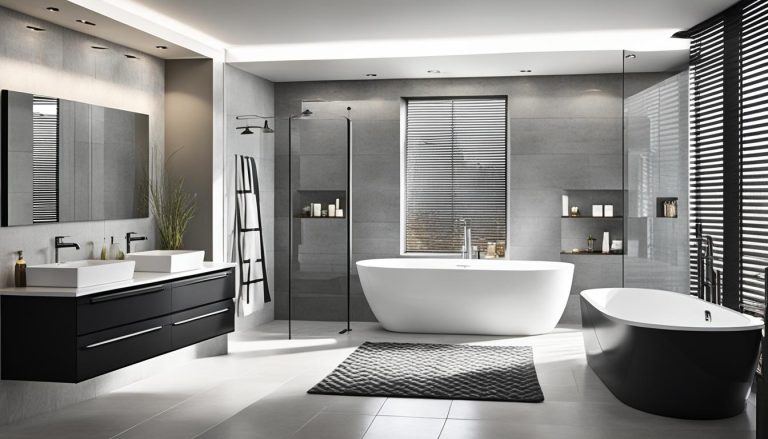
Modern and masculine bath

Hello, everyone! I’m finally back to my blog. I’ve been gone so long that WordPress has a completely new update…yikes. But enough about that, let’s get to some design inspiration. How about a modern, masculine, black and white bath?

This bathroom is actually in my son’s and his husband’s home. They came to me last summer when they had a serious leak which pushed the bathroom renovation up to the top of their priority list.

Justin, my son-in-law had already done the hard work and had a very good idea of what they wanted. So I just brought them samples, they quickly agreed on the final selection and once we had the contractor on board, we were ready to go.

This is what we were dealing with before.

Before- Modern,masculine bath
Before
Before modern bath renovation
Before

As you can see it is a tiny bathroom, or as they like to say it’s very quaint bathroom. And it’s their only full bathroom. So, we made sure that all items were on site and ready to install as soon as our contractor was ready to start. That way no downtime. Having them go on a vacation while it was being done was also fortunate. And they came home to a new, leak free bathroom.

Modern, masculine bath

They had recently replaced the toilet so that remained. The vanity is from Ikea and came with the sink and a bamboo counter. The bamboo wasn’t quite what we wanted so instead we picked up Ikea’s butcher block counter and had it cut to size by our contractor. Justin already had the shelf brackets so we just had the excess butcher block cut for the matching shelves.

Modern, masculine bath
Lighted mirror and shelf for modern, black and white bath

The lighted vanity mirror and the black faucet were found at a big box store.

Detail of shelf
Modern, masculine, black and white bath
Wood accents coordinate with wood floor
Modern, masculine, black and white bath

I love that the wood accents pick up on the wood floor and banister right outside the bath.

Black and white modern bath renovation
Black and white modern, masculine bath

The hexagon floor tile was something that they knew they wanted from the start. It looks amazing and has a little old world feel which is perfect for their almost 100 year old home.

Modern, masculine bath

The new tub has an updated square profile and the subway tiles are slightly oversized for another modern twist. Dark grout makes cleaning a little easier and the shower door’s barn door hardware picks up on both the grout and the floor.

A new window was installed since this was the ideal time to ensure it was watertight and energy efficient.

Vintage details in bath renovation
Vintage vent

I love the juxtaposition of the new black hexagon floor with the vintage vent. So much character!

Here’s a few more photos of the space.

Modern, masculine bath
Black and white, modern, masculine bath
Black faucet on Ikea sink and vanity
Modern, black and white masculine bath
After - Black and white, modern, masculine bath
Modern, masculine bath

We are all very happy with the outcome. How can we update your bathroom?

Serene ensuite bath

Serene master bath

My clients’ serene ensuite bath is finished! They are thrilled! No more sharing their children’s bathroom. 🙂 It’s perfectly spa like with soft blue grey walls, a luxurious soaking tub, large shower stall, carrera look tiles and a wood finish vanity.

Serene master bath
Serene master bath - vanity

Shower area

We kept the bathroom’s layout as it was functional and very budget friendly. The shower area is now square and fitted with a custom glass enclosure. As my clients are on a well and have hard water we chose a medium toned grey mosaic tile for the shower floor. It will help hide any future staining.

Serene master bath - shower

Large scale white subway tiles with a glossy hand finished quality to them line the shower walls. These tiles are stunners in real life and very easy to clean with their minimal grout lines. The water fall shower head completes the luxurious feel of this shower.

Serene master bath
Before - master bath shower
The shower area before

Tub area

The beautiful soaker tub now takes centre stage in the bathroom. It’s simple tulip like shape fills in the space and the floor mounted bath tub filler is like a little piece of sculpture in the room.

Serene master bath - freestanding tub
Serene master bath - tub area

And with that gorgeous view outside, who wouldn’t want to soak in here for hours?

Serene master bath - freestanding tub
Before - master bath tub area
The tub area before

Vanity area

Serene master bath

The vanity area is completely updated with a contemporary wood finished double sink vanity. Complete with quartz counters and square double sinks it is the perfect spot for sharing.

The carrera marble look porcelain tile flooring is the perfect blend of classic and low maintenance. Again the large scale rectangular shape means minimum grout lines to keep clean.

Before - master bath vanity area
The vanity area before

My clients originally had a toilet and bidet in this room. The decision to remove the bidet (which was only being used by the dog for his drinking bowl) allowed us to gain more space under the window. This allowed the toilet to move over slightly and give a little more breathing space at the vanity.

Serene master bath
Serene master bath - vanity

I am absolutely in love with the scale backsplash tile. We opted to do the whole wall for impact and to keep it soft and calm, we used a matching white grout. The fish scale pattern is perfect for a bathroom and it can be installed the opposite way to mimic a wave pattern.

Serene master bath - backsplash detail
Closeup of the backsplash tile

The round mirrors are contemporary and allow the backsplash to shine. And they coordinate with the rest of the bath’s chrome fixtures and finishes.

Serene master bath - backsplash detail
Serene master bath
Serene master bath

Are you in need of a bathroom renovation? You can check out another recent ensuite bath renovation here.

Give me a call and let’s start planning your dream bath.

Designing a modern cottage bath on a budget

This is the second in a series I’m writing about the renovation and makeover of my country log cottage. Here’s how I gutted and designed a new modern cottage bath on a pretty low budget.

Modern cottage bath with subway tile and repurposed library table as vanity

It is a little scary but it started out like this.

Before photo of bath with details on changes

If you look closely on the above picture, you can see right where the shower base meets the floor, there is a large crack.  That’s where the floor was totally rotten. Like I mean so rotten, I was scared whenever someone used the bathroom that they would fall through the floor. You could actually see the basement through the crack.  Yikes! Obviously we knew this before we bought. So, this bathroom was pretty much the first job we tackled once we had possession. We basically had to take everything out and start over. Even the side of the cabinet had significant water damage as well as the wall so everything came out.

Like the cottage living room post (click here to read it), I’m showing you on the before picture what the plan was and how it was executed. So, here’s a visual breakdown of what we did for our modern cottage bath.

After bath photo showing some of the changes that were made

First, we gutted everything. Next we put in a completely new subfloor, installed new water resistant drywall and used the Kerdi shower system to ensure that the shower would be completely waterproof. Hubby got to work on all this nastiness and I got to go shopping. Not quite fair, I know.

I wanted an interesting, inexpensive vanity that was open on the bottom to help make the tiny bath feel more spacious. I had previously used an antique dresser in my powder room at home so I thought potentially something like that but without the drawers, some kind of table. As luck would have it I found an antique library table when I went with some fellow designers to the Brimfield Antique Show (you can read that post here). I knew it would be perfect, once I figured out how to raise it a few inches since it was a little short.

Before of the antique library table used as a bathroom vanity

Once I found this piece, it all started to click together. I wanted to highlight the barley twist legs so I decided that I would paint the legs. I had recently heard about the Canadian paint company, Fat Paint, so I contacted Victoria the owner, and told her what I was looking for. She offered to customize a colour for me so I just needed to choose one.

I know, this is where everyone wonders how did I choose a colour? It is actually quite systematic. I went shopping for flooring tiles, as I would need them sooner rather than later. I was also curious to see what I could find. The tile I settled on looks like wood but it isn’t, it is ceramic. We also ran it into the hallway outside the bathroom and in the nearby laundry room. Well, this floor went with the nearby slate floor and it had the slightest touch of turquoise in it, so it became the jumping off point for the colour scheme. I decided on a darker turquoise for the vanity that would really highlight the carved legs.

From here, I chose the shower wall tiles and the river rock coloration, then lastly I chose the wall colour, Benjamin Moore’s Woodlawn Blue, a soft version of the vanity’s legs. This is exactly why you always choose paint last in your renovation. So much easier to choose a paint colour to work with your fixtures, as there are endless colours of paint in comparison to tile selections.

Modern cottage bath with painted open repurposed vanity and square sink

Once I had decided on the vanity colour, I got in touch with Victoria and she automatically offered to mix me up a custom colour and ship it to me free of charge so I could try it out. Talk about service!

I found some prefab wood legs at my local Home Depot that I figured would work as extensions on the bottom of the table. So my husband, attached them and I set about painting the base. You can barely tell that the bottom six inches or so of the table is not original and I’m sure if I hadn’t told you, you would never have noticed. If you are thinking of painting a wood piece and want to do minimum sanding and prepping, check out my post here about how Fat Paint works. It saves you so much time.

Last but not least, I refinished the top with quite a few coats of durable polyurethane so that it would stand up to some splashing.

I loved that the library table had a nice little lower shelf as I was planning to pick up some baskets for storage. And those baskets would also help to hide the necessary plumbing underneath the sink. Since this is the main floor bath and acts as a powder room most of the time, I knew I wouldn’t need closed storage.

Close up of repurposed library table with painted barley twist legs

Next I chose a rectangular sink because I wanted it to mirror the shape of the table itself. I love this one from Kohler, it’s timeless, works perfectly with the square base of the Delta Dryden faucet and gives me that modern cottage bath feel I was after. BTW – Another great cost saving for me was Delta offered me the shower and sink fixtures free of charge for an honest opinion of them.  You can read my original post here.  

The lilypad artwork in the above photo is actually a photograph from a local artist. I love picking up original pieces from the area. My husband loved it and it was the perfect colours and feel for our modern cottage bath.

Library table turned bathroom vanity

Photo credit Melissa Kew Photography

For the shower I had my heart set on river rock tile. How perfect are they for it a beach front cottage? To offset the cost of them, I used simple grey matte oversized subway tiles on the rest of the shower walls.

Grey matte subway tile subway with bronze fixtures and river rock floor

I added a border of marble and glass tiles 2/3 of the way up that ties in the bath colours. My husband, figured out that he could run the subway tiles vertically above the border, so we did just that. This is called a soldier’s course, in case you are interested. This also has the added bonus of making a low ceiling feel higher. In this low ceiling bathroom that was a huge plus.

Close up of subway tile and border tile with bronze shower fixtures

I love the square Dryden fixtures and they add the right amount of masculinity to my modern cottage bath. Below, you can see the little niche for shampoo and soaps, he did with the river rock tile.

Shower niche with river rock tile

We removed the second shower head and raised the remaining one up to a proper height, since it was low. A great cost savings on the shower was the fact that we reused the shower glass and door. We just ordered new bronze trim and a handle to match the shower and sink fixtures. And thankfully we didn’t break it removing it and reinstalling it. We did sweat that alot!

Round reclaimed wood mirror with bronze bath faucet and lighting

Photo credit Melissa Kew Photography

A new toilet was installed and I sourced an oval mirror, to balance all the squares and rectangles in the space. It’s made from repurposed wood and has a nice rustic feel for a country bath. I had two sconce lights placed on either side of the mirror to replace the one hollywood strip. Did you know that being lit from each side is eminently more flattering than overhead lighting aka Hag lighting? The sconces themselves are simple and slightly industrial with a dark finish to match the fixtures.

Bronze faucet with repurposed antique library table vanity and reclaimed wood mirror

We also installed a few of these cute little deer hooks so that hanging up towels is quick and easy.

Shower with subway tile, river rock floor and bronze fixtures

My husband, was a huge part of this renovation. He did all the demo, all the tile work, all the installations except where we needed professionals. So obviously if you can do some of the work yourself that will be a great savings. Just remember though, that you should know what you can or cannot tackle. Sometimes DIY leads to even more expense when you have to call in the experts to fix a wrong.

All in, this renovation cost us under $8,000. Which is actually very reasonable as an average bathroom renovation costs around $20,000 and quickly goes up. Keeping everything in the same footprint in this tiny bathroom helped to keep the cost low. The majority of the cost was definitely the Kerdi Shower system. We didn’t want to skimp on that as we didn’t want a repeat of the water damage that had happened.

So there you have it, our modern cottage bath.

Modern cottage bath with unique vanity and river rock shower floor

So when can we start working on your bathroom renovation?

A new phase – What do you want your home to be?

Photo by Anthony Tran on Unsplash

Photo by Anthony Tran on Unsplash

A new phase begins. What do you want your home to be?

So now that the kids have left or about to, how do you want or need your home to function? This is the key to making your home work for you and your partner. Think about how you want to live. 

What are your goals? 

For example, do you want to entertain or travel more, start or continue a hobby, or just get out from under the clutter?

What path would you like to go down? 

More entertaining?

If entertaining is key to you, then perhaps an open concept kitchen/dining/living area will allow you to host those larger groups more easily.  Perhaps removing some walls (once an expert has determined this is doable), will make this a reality. 

Maybe you need a guest room or bathroom for out of town family and friends, then it is time to redo a few rooms to suit grown ups.

Want to travel more?

Than how about making your home more maintenance friendly. Easy care and durable finishes are a must. Declutter spaces for easy cleaning and installing internet capable thermostats and alarm systems will give you peace of mind travels. Perhaps you want to travel so much that a condo may be the ideal move for you. No yard or exterior to maintain may just be the ticket….pun intended.

Planning on playing?

Perhaps continuing with or starting a new hobby is exactly what you want to do in the next phase. Think about changing up that extra room or space into an art studio, music, craft, sewing or even a theatre room, so you can indulge your inner movie critic. Rooms DO NOT have to stay as they are advertised on your floorplan.

Or do you just need a refresh? 

Something to make your home feel shiny, fresh and new! 

Decluttering of course, is almost always necessary. First, check with the kids about everything they may want or need. Than be pretty ruthless about this, you DO NOT want six storage units full of stuff that no one wants and that you are paying monthly fees on.  Those units should be for temporary use only. Such as if you’re moving and want to store some furniture while you are staging your home or you are keeping items for a university student to use when they get their own home (hopefully sooner than later).

I know grandparents stuff can be sentimental or valuable, if so keep the best pieces that you love and can incorporate into your home, but not the entire dining room set that you don’t care for or have the room for. That chandelier that is priceless and unique can be the focal point in a contemporary room. A mix of design styles makes your home personal and interesting so don’t be afraid to challenge the norm. Breaking rules can be just the thing. That chandelier could be a showstopper in your master bedroom or bath. It doesn’t have to be in the dining room.

Paint or new flooring can also go along way to revamp a home. If you have worn and stained carpet, install hardwood. It is timeless, especially a mid-toned brown one with medium sized planks. Think of a french chateau with those beautiful hardwood floors, they never date. A stunning herringbone pattern will be cherished forever. Just choose what you love and not what you see everywhere, because that is likely a trend.

If hardwood is not your style, then a stone such as marble, slate or granite is another classic choice. If these are too pricey, then a great faux stone tile can also work. Typically porcelain tile is more durable than ceramic, but always ask your tile supplier about the durability of your selection and make sure you tell him/her where it is going. What is durable for a busy hallway versus a hardly used powder room can be vastly different.

Keep grout in mind as well for ease of maintenance, ideally it should be mid toned as well and now there are many stain and water resistant versions on the market. They are costly but well worth the investment.

Paint should always be chosen last on a project, yes dead last. There are millions of paint colours available but not millions of sofa or drapery fabric or tile choices. And also keep in mind paint should always complement your fixtures so DO NOT ignore the pinky beige carpet or tile (if you are keeping it) or you may end up highlighting it instead of working with it.

So think about what your goals are for your home and then you can start making your Reclaim your Home plan. 

I’ll be posting more in depth information on all of these options in the next few weeks so keep checking back. 

Lisa

White, clean and calm ensuite bath

Do you need a bathroom renovation that will make your house more serene, more practically organized and more like you? Well, keep reading to find out how the process works and just what can be achieved in your home.

This bathroom transformation went from dark, cluttered and drab to white, clean and serene. Isn’t she pretty and practical now?

Calm and serene master bath

These clients had a wish list that included:

  • two sinks,
  • lots more storage,
  • larger shower,
  • removing the tub,
  • better lighting,
  • proper venting, and
  • white and serene bath.

This ensuite  bath had no personality and obviously was dismal at even providing proper storage. It had only one sink in a crowded vanity, a window and tub where my client had envisioned the shower going, an awkward semi-circular shower enclosure and virtually no ventilation or proper lighting. It is definitely not possible to get ready to take on the day here or for that matter relax at the end of the day?

Before – master bath

You can see the semi-circular shower in the mirror opposite the vanity and behind the door. And the built in tub that was never used.

Before – master bath

I did up three different plans and after consulting with me and their contractor, the clients decided on this plan.

burnsopt3layout

burnsopt3

Originally we were going to move the toilet and the door but moving a toilet is an expensive option, so in the end we left both the toilet and the door where it was.

Then I did up two mood boards which shows tile, lighting and fixture selections. They went with Option 1. burns-master-bath-001

Here’s a closer look at the tile selections.

Master bath tile selection

The large scale shower wall tile looks like glass but it is actually porcelain and it is a breeze to clean. As per the norm, some items were changed from the moldboard to creation. The vanity was a great find and you’ll see why as you keep reading. The lighting was also changed to discreet pot lights where needed. We felt there was enough going on in the vanity area so this kept the area cleaner.

Where there was cramped, dark and non functioning, there is now this clean, serene, spa like space.

Calm and serene master bath So, what did we do exactly? We moved the vanity from it’s existing place at the right of the door to where the built in tub was. That way we got enough room to put two sinks and that enabled us to place the shower where the vanity had been. Originally, the clients wanted to swap the tub for the shower, but then the window was going to be partially in the shower enclosure. It could have been done, but this was a more cost effective and worry free solution. Moving the shower where the vanity was allowed for a much larger area and since it is all glass it feels very open when you are entering into the bathroom.

My clients also wanted a large inset shower shelf but since the main, long wall was an exterior wall, we couldn’t put a shelf there. So, instead we placed two smaller inset shower shelves, one on each side of the shower tower and it worked perfectly.

Custom shower with two inset shelves

Inset shower shelf

The inset shelf tile is the same as the shower floor and it was also used as a vanity backsplash, for continuity.

Custom shower with two inset shelves

Closeup of vanity area

Clean and serene master bath

The cool thing about this vanity is that the bottom toe kick is actually a secret drawer. Therefore, it has even more storage than you expect.

Clean and serene master bath

And those upper mirrored cabinets, well they cantilever up for easy access to even more storage.

Clean and serene master bath

My client, picked up this adorable teak stool that she uses in the shower, when needed.

Clean and serene master bath

How much nicer is it to get ready in this dream of a bath? If you need the answer to that question, give me a call and we can start working on your dream bath.

Lisa