Log home dining room update

It’s certainly been awhile, but I’m back with my last post on my log cottage renovations and makeovers. This time I’m sharing my log home dining room. Also if you’d like to read the other log home posts here they are:

Living room makeover

Modern log home bath renovation

Log home sunroom

Fresh and bright log home kitchen renovation

 And back to the dining room. Here is what it looks like now.

Log home dining room after

Photo credit: Mark Hollaron

It started off like this.

Log home dining room before Log home dining room before

Log home dining room before

So as you can see there weren’t a huge amount of changes in this room. It was actually a make under., I took away alot of things. Here’s exactly what I did.

Log home dining room changes

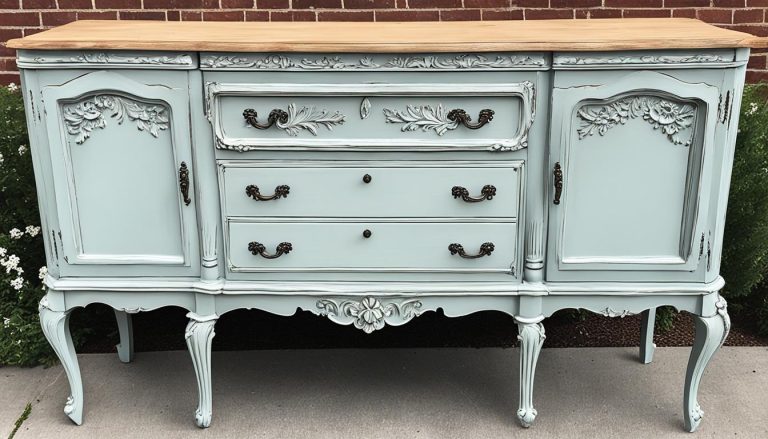
I also painted out our hutch in a sunny yellow chalk paint. It was originally dark brown, you can see it here and how I did it’s makeover  in this post. Also, this hutch and the buffet (used in the front entry and also painted the same yellow) and the table in the sunroom (painted a bright green) were all from the same set. So don’t be afraid to break up sets and paint them in fun colours.

Blue and green plate wall

The plate wall is done and continues to be a work in progress. As I collect plates, I’ll add them to this display. I wrote about this plate wall and how the plates are hung in this post. Obviously,  I really need a better photo showing these plates over the buffet now.

Also just visible in the left corner of this picture is the window seat. I had new window seats made in a soft blue and finished them with some fun throw pillows in various textures, patterns and colours.

Log home dining room

And I am still not quite done with this log home dining room. I’ve been wanting to paint out the windsor chairs in a black for a long time. Maybe one of these days I’ll get around to it or have someone do it for me. I think it would be a great update to the space.

And that amazing open black lantern is from Troy Lighting. I instantly fell in love and it was my first cottage purchase and also the first item we installed.

Here’s the before and after for you one last time. Sorry about the quality of the before picture.

Log home dining room before

Log home dining room after

Photo credit: Mark Hollaron

You can check out more of my log home in the online version of Ottawa at Home’s Summer edition 2018.

A log cottage kitchen transformation

Well after a loooonnngg break, I’m back at blogging. I hope your summer has been going along well, mine has been busy, as per usual with projects, cottage company and gardening. But of course, come January I will be wishing for that summer busyness. In today’s post I’m sharing my log cottage kitchen which we recently renovated. This post will showcase my steals and splurges on this kitchen reno.  So sit back, grab a coffee or tea and follow along on my log cottage kitchen reno adventure. Huh, maybe renoventure….it really should be a word.

log cottage kitchen with blue cabinetry, stone island and open shelving

So this kitchen started looking like this.

Before Kitchen

So let’s start with the bad:

  • lots and lots of wood, so much so that it felt dark and dingy
  • drop down breakfast bar on the island that was too low for anyone to actually sit at
  • the wood window shutters, more wood??
  • leaking sink and faucet
  • ineffective and insufficient lighting
  • false ceiling over sink, which made that area even darker
  • floral backsplash
  • chipped and lifting countertop
  • desk area that was not functional

However, it had lots of good:

  • size and layout was great
  • flooring is in great shape
  • stone island wall
  • most cabinetry boxes were in great shape
  • two large pantries which were still working well
  • vent downdraft was existing
  • corner china cabinet
  • lots of windows
  • lots of counter space

So our TO DOs were to:

Before kitchen

Before kitchen Before kitchen

So there were definitely lots of places where we could save money. Originally I wanted to keep the cabinet fronts and just have a few made to match and then paint the entire kitchen.  However, once I took the cherry fronts to a few companies for an estimate on refinishing, they gave me the bad news that the finish on them was in such bad shape that they would have to be stripped bare. Which was going to be approximately $100 per door, not including the cost of spray painting them. So…onto Plan B – all new cabinet fronts. I can’t say it was inexpensive as it was a custom job but I am thrilled with the results.

The plan on computer via Sketchup. I love that it actually came out really close to my original plans.

Log cottage design with ketchup Log cottage design with sketchup Log cottage design with sketchup

Cabinetry

The decision for a blue/grey colour for the cabinets was made shortly after we moved in and it was still my top choice. With all the orange of the wood, the cool tones of the blue/grey are a soothing visual relief. It complements the wood and allows the remaining wood in the kitchen to sing. No one used to notice the log ends by the pantries before but now everyone points them out.

log cottage kitchen with blue cabinetry, stone island and open shelving

Once we had a good look at the cabinetry we realized that all the lower drawer cabinets were sagging so we made the decision to have all new lower cabinetry made. We also removed the desk under the window. Due to the lower windows in this area, I decided to have cabinetry made to look more like a piece of furniture here. The two large cabinets house all my big platters, bowls and serving dishes and the open shelving offers some display area.

I had been going back and forth on whether to use butcher block here or continue with the quartz countertop. However, once the quartz fabricator did his measurements we were looking at having to purchase two slabs to cover the entire kitchen. So the butcher block was the perfect way to keep the budget in check and since they were from Ikea they were a steal. Plus they are a great match to the existing wood.

The existing china cabinet was refaced and I had new seeded glass installed that looks like water droplets, so pretty! I also had new lighting installed so it can be lit for entertaining.

The center upper cabinetry was all removed and I added in one small upper cabinet where the existing microwave cabinet had been. This was specifically for glasses and mugs as I knew this would be the tea/coffee area. Black cabinetry hardware was added with square knobs on the cupboards and cup pulls on the drawers.

log cottage kitchen with blue cabinetry, stone island and open shelving

The rest of the cabinetry boxes stayed and just fronts were made for them. I also had the dishwasher and fridge panelled to match. This was a splurge but I DO NOT regret a penny of it. In fact this is my hubby’s favourite thing in the kitchen.

Island

I also wanted to keep the stone island as there is a matching fireplace and exterior garden walls. This stone is local and comes from a closed iron ore mine that my father-in-law used to work at. So there’s sentimental and practical reasons for keeping the stone. My husband wanted the kitchen to have two colours so I was happy to accommodate this by painting the island in a soft black, which was pulled from the stone colour.

However, once the new induction cooktop and downdraft fan were bought we realized that the existing island was about 2-3″ short in depth to accommodate them.  My carpenter was a genius in managing to keep the stone front of the island, by propping it up while the rest of the entirely new island was built around it.

The fun with the island didn’t stop there. Because of the drop down breakfast bar the stone was too short for the now one level island. This shortfall was fixed by having a piece of wood cut to fit and painted the same black/grey as the island. And then of course there were the holes left when the existing supports were removed. My husband, was the hero at this point when he found stone that would fit and fixed all the gaps. Lastly, custom corner corbels were added to each end of the island.

Log cottage kitchen with stone island

Open wine storage was added back on one end and a beer/wine fridge now installed in the island, holds even more. About 6″ of unused space at the far end of the island became a cupboard with narrow shelves perfect for holding cat food supplies. An electrical outlet was also added on the far end of the island for convenience.

Shelving

The live edge wood shelving was a real labour of love. I knew I wanted them to be floating with no visual means of support and that took some doing. We purchased the shelving rough from a supplier and had them cut to size. I spent many, many hours taking off the bark and sanding them down. Then my husband went to a welder to have custom supports made that were then drilled into the log walls to ensure they would be completely stable. Then the shelves themselves had to be drilled to match the metal support dowels. We were thankful that we found all these amazing labourers in our little town. Once up we both loved them and they were definitely worth all the effort.

Log cottage kitchen with live edge open shelving detail

Now they house all our everyday dishes and a few special pieces that I rotate once in a while, when I tire of the view.

Countertops, sink and faucet

As I mentioned above I used quartz for the main counters and butcher block for the lower cabinet by the window. I am still in love with these quartz counters. They have a casual, natural feel and the slight veining in them helps to disguise any dirt.

Quartz countertop

iPhone pic

For the sink I originally wanted a farmhouse sink but it wouldn’t work with the angled corner of my kitchen without moving the dishwasher and since I was trying to keep the costs low, I went with Plan B again. A stainless steel, rounded square sink.

log cottage kitchen with blue cabinetry, quartz counter and sink and faucet detail

I went back and forth on either a double, single or one and a half sink. I ended up selecting the one and a half sink. Since the area wasn’t too big, a double sink would have meant two tiny sinks. So the convenience of having two sinks won out.

log cottage kitchen with blue cabinetry, quartz counters, sink and faucet details

The Artesso articulating faucet was generously donated by Brizo in exchange for my blogging about it.  I loved this faucet and planned alot of things around it. I knew I wanted a dark finish to contrast with the light cabinetry and counters.

Log cottage blue kitchen with faucet detail

She’s a beauty and I absolutely enjoy her every day.

Lighting

I also wanted dark finishes on my lighting but I love the look of mixed metals. So I went with dark finishes but with little hints of bronze.

Log cottage blue kitchen with lighting detail

log cottage kitchen with blue cabinetry, stone island and open shelving

As you can see in this picture above the large pendant has a dark grey and bronze finish.

log cottage kitchen with blue cabinetry, stone island and open shelving

The articulating sconces are also a dark finish but with bronze necks. The sink pendant also has a dark  finish but with clear glass.

The wall you can just see on the left I made into a chalkboard. It’s a fun place for everyone to put messages.

Backsplash

I kept the backsplash neutral and clean, since there were enough finishes and textures going on. So even, though I love a fun cement tile, I kept it simple. This large scale subway matte tile has a handmade look and with the soft grey grout it is pretty timeless.

Log cottage blue kitchen with white subway tile and live edge wood shelves

It covers the entire back and side walls of the kitchen. We painted the walls above the cabinetry the same colour white as the tiles to keep the flow.

Log cottage blue kitchen with white subway tile and live edge wood shelves

This was not quite a complete gut but it was certainly transformative. Most people who had seen the kitchen previously, think we have enlarged the space. It just goes to show how light and brightness can make such a difference your home.

Now, how can we transform your kitchen?

*Photography credit: Melissa Kew Photography – all photos except before and iPhone pictures


How to design and furnish a sunroom

Boy, it’s a hot summer here so far. So in honour of the season, I’m sharing my log room sunroom that I designed and furnished when we bought our log home a few years ago. So whether your sunroom is actually a covered porch, a screened in 3 season room, a Muskoka room or a free standing gazebo, these tips will help you.

Here’s how one side of the sunroom looks now.

Log home sunroom

And the other side.

Sunroom design

blue log cottage sunroom

Blue log cottage sunroom

This is what I started with.

Before sunroom

I bought more substantial and darker wicker furniture and had the cushions made with sunbrella fabric so that there was no worry about sun damage or a wet bathing suit. I chose blue fabrics that complemented each other but that were not the same for interest. Instead of a coffee table I went with an ottoman. It can be used for your feet, as an extra seat or for putting a tray on and using as a table.

Blue log cottage sunroom

The various throw pillows were made by me and I selected more contrasting patterns but with the same colours of blue as in the upholstery. I primarily used blue in this room but with little touches of a soft green. It shows up on the table base, on candle holders and on a few other decorative accessories.

blue log cottage sunroom

A small corner shelf adds a little display area and makes the corner interesting. A little round glass table holds a table lamp and in the other corner a larger table is for display and to place a drink or two. A floor lamp brings much needed light into this corner.

blue log cottage sunroom detail

My grandfather’s ice saw from the early 1900’s takes pride of place over the window. You can just see it on the picture below. An indoor/outdoor rug with a fun french poem written on it anchors the seating area.

blue log cottage sunroom

The little piano stool, from a barn sale, is painted a fun turquoise that matches the curio cabinet in the living room.

Turquoise piano stool used as table in sunroom

And here’s how the other side of the room looked like before.

before sunroom

First up we had to do a repair on the floor tiles right in front of the door. Since the existing terracotta tiles were not available nor would they have matched I went with a different pattern terracotta tile for this area, I think it makes it look like an accent rug.

blue log cottage sunroom

We also took out three of the six skylights as the lower ones were too close to the edge of the roof and leaked all the time. We kept it as an eating area and this is also where we often play cards. Removing the shelf allowed for a larger table and chairs. I also hung a black industrial style pendant light. And for a little bit of fun, I painted and placed some old oars as wall art on this wall.

log cottage detail

Log cottage sunroom

The other side of the room, which you don’t see has a large bookcase across from the table. And there are two sets of french doors which take up the rest of the wall space.

Sunroom detail

If you’d like to read about the other rooms in my log cottage, click on the links below. And stayed tuned, as I’ll be sharing more of the rooms throughout the summer. You can also read about my log cottage feature online in Ottawa at Home’s summer edition by clicking here. 

Log cottage living room 

Log cottage bathroom 

All photos except before pictures:  Melissa Kew Photography

Designing a modern cottage bath on a budget

This is the second in a series I’m writing about the renovation and makeover of my country log cottage. Here’s how I gutted and designed a new modern cottage bath on a pretty low budget.

Modern cottage bath with subway tile and repurposed library table as vanity

It is a little scary but it started out like this.

Before photo of bath with details on changes

If you look closely on the above picture, you can see right where the shower base meets the floor, there is a large crack.  That’s where the floor was totally rotten. Like I mean so rotten, I was scared whenever someone used the bathroom that they would fall through the floor. You could actually see the basement through the crack.  Yikes! Obviously we knew this before we bought. So, this bathroom was pretty much the first job we tackled once we had possession. We basically had to take everything out and start over. Even the side of the cabinet had significant water damage as well as the wall so everything came out.

Like the cottage living room post (click here to read it), I’m showing you on the before picture what the plan was and how it was executed. So, here’s a visual breakdown of what we did for our modern cottage bath.

After bath photo showing some of the changes that were made

First, we gutted everything. Next we put in a completely new subfloor, installed new water resistant drywall and used the Kerdi shower system to ensure that the shower would be completely waterproof. Hubby got to work on all this nastiness and I got to go shopping. Not quite fair, I know.

I wanted an interesting, inexpensive vanity that was open on the bottom to help make the tiny bath feel more spacious. I had previously used an antique dresser in my powder room at home so I thought potentially something like that but without the drawers, some kind of table. As luck would have it I found an antique library table when I went with some fellow designers to the Brimfield Antique Show (you can read that post here). I knew it would be perfect, once I figured out how to raise it a few inches since it was a little short.

Before of the antique library table used as a bathroom vanity

Once I found this piece, it all started to click together. I wanted to highlight the barley twist legs so I decided that I would paint the legs. I had recently heard about the Canadian paint company, Fat Paint, so I contacted Victoria the owner, and told her what I was looking for. She offered to customize a colour for me so I just needed to choose one.

I know, this is where everyone wonders how did I choose a colour? It is actually quite systematic. I went shopping for flooring tiles, as I would need them sooner rather than later. I was also curious to see what I could find. The tile I settled on looks like wood but it isn’t, it is ceramic. We also ran it into the hallway outside the bathroom and in the nearby laundry room. Well, this floor went with the nearby slate floor and it had the slightest touch of turquoise in it, so it became the jumping off point for the colour scheme. I decided on a darker turquoise for the vanity that would really highlight the carved legs.

From here, I chose the shower wall tiles and the river rock coloration, then lastly I chose the wall colour, Benjamin Moore’s Woodlawn Blue, a soft version of the vanity’s legs. This is exactly why you always choose paint last in your renovation. So much easier to choose a paint colour to work with your fixtures, as there are endless colours of paint in comparison to tile selections.

Modern cottage bath with painted open repurposed vanity and square sink

Once I had decided on the vanity colour, I got in touch with Victoria and she automatically offered to mix me up a custom colour and ship it to me free of charge so I could try it out. Talk about service!

I found some prefab wood legs at my local Home Depot that I figured would work as extensions on the bottom of the table. So my husband, attached them and I set about painting the base. You can barely tell that the bottom six inches or so of the table is not original and I’m sure if I hadn’t told you, you would never have noticed. If you are thinking of painting a wood piece and want to do minimum sanding and prepping, check out my post here about how Fat Paint works. It saves you so much time.

Last but not least, I refinished the top with quite a few coats of durable polyurethane so that it would stand up to some splashing.

I loved that the library table had a nice little lower shelf as I was planning to pick up some baskets for storage. And those baskets would also help to hide the necessary plumbing underneath the sink. Since this is the main floor bath and acts as a powder room most of the time, I knew I wouldn’t need closed storage.

Close up of repurposed library table with painted barley twist legs

Next I chose a rectangular sink because I wanted it to mirror the shape of the table itself. I love this one from Kohler, it’s timeless, works perfectly with the square base of the Delta Dryden faucet and gives me that modern cottage bath feel I was after. BTW – Another great cost saving for me was Delta offered me the shower and sink fixtures free of charge for an honest opinion of them.  You can read my original post here.  

The lilypad artwork in the above photo is actually a photograph from a local artist. I love picking up original pieces from the area. My husband loved it and it was the perfect colours and feel for our modern cottage bath.

Library table turned bathroom vanity

Photo credit Melissa Kew Photography

For the shower I had my heart set on river rock tile. How perfect are they for it a beach front cottage? To offset the cost of them, I used simple grey matte oversized subway tiles on the rest of the shower walls.

Grey matte subway tile subway with bronze fixtures and river rock floor

I added a border of marble and glass tiles 2/3 of the way up that ties in the bath colours. My husband, figured out that he could run the subway tiles vertically above the border, so we did just that. This is called a soldier’s course, in case you are interested. This also has the added bonus of making a low ceiling feel higher. In this low ceiling bathroom that was a huge plus.

Close up of subway tile and border tile with bronze shower fixtures

I love the square Dryden fixtures and they add the right amount of masculinity to my modern cottage bath. Below, you can see the little niche for shampoo and soaps, he did with the river rock tile.

Shower niche with river rock tile

We removed the second shower head and raised the remaining one up to a proper height, since it was low. A great cost savings on the shower was the fact that we reused the shower glass and door. We just ordered new bronze trim and a handle to match the shower and sink fixtures. And thankfully we didn’t break it removing it and reinstalling it. We did sweat that alot!

Round reclaimed wood mirror with bronze bath faucet and lighting

Photo credit Melissa Kew Photography

A new toilet was installed and I sourced an oval mirror, to balance all the squares and rectangles in the space. It’s made from repurposed wood and has a nice rustic feel for a country bath. I had two sconce lights placed on either side of the mirror to replace the one hollywood strip. Did you know that being lit from each side is eminently more flattering than overhead lighting aka Hag lighting? The sconces themselves are simple and slightly industrial with a dark finish to match the fixtures.

Bronze faucet with repurposed antique library table vanity and reclaimed wood mirror

We also installed a few of these cute little deer hooks so that hanging up towels is quick and easy.

Shower with subway tile, river rock floor and bronze fixtures

My husband, was a huge part of this renovation. He did all the demo, all the tile work, all the installations except where we needed professionals. So obviously if you can do some of the work yourself that will be a great savings. Just remember though, that you should know what you can or cannot tackle. Sometimes DIY leads to even more expense when you have to call in the experts to fix a wrong.

All in, this renovation cost us under $8,000. Which is actually very reasonable as an average bathroom renovation costs around $20,000 and quickly goes up. Keeping everything in the same footprint in this tiny bathroom helped to keep the cost low. The majority of the cost was definitely the Kerdi Shower system. We didn’t want to skimp on that as we didn’t want a repeat of the water damage that had happened.

So there you have it, our modern cottage bath.

Modern cottage bath with unique vanity and river rock shower floor

So when can we start working on your bathroom renovation?

How I designed and updated a log cottage living room on plan and on budget

Since lots of you had questions and wanted to see a bit more about our log cottage that was published in Ottawa at Home summer edition, I thought I’d share how I designed and updated the cottage living room on a plan and with a fairly strict budget.

Here’s how it looks now.

Log home living room with white sofas and blue swivel chairs

Photo credit: Melissa Kew Photography

Since it is a large living room, I worked mostly with the furniture left behind and what we brought from our other cottage. By repurposing and reimagining a number of pieces I was able to keep within our budget.

Pictures do say a thousand words so here’s a quick breakdown of what changed in the cottage living room.

Before picture of log cottage living room with design changes

The sofa and love seat were great quality and in perfect shape, so I quickly decided to slipcover them in a white denim. Slipped off and washed at least once a year they stay clean and fresh. And putting throws where they are likely to get soiled helps keep them clean longer. I love that they make the room a little brighter as all wood interiors can get dark.

Donating the traditional area rug to a shelter allowed me to have a faux sisal wall to wall rug cut and bound to size. This is the perfect thing to do when you need a specific size or a very large area rug. It has held up nicely and it hides sand very well.

Removing the swag drapery treatments lets the view speak for itself. Privacy isn’t an issue and with the large roof overhand that is typical of log buildings, sun damage isn’t either. Simpler and more light, both big pluses in my book.

Even if the large clock and console were left by the previous owner, I would have removed both of them,  as there was far too much furniture in the space.

I relocated the existing occasional tables within the cottage and purchased an end table and coffee table from Urban Barn, with a lucky gift card win. Made from repurposed wood they have the rustic feel and look I was going for. Though they do strike a bit of a challenge when placing your drink on them, with their uneven surface.

My grandfather’s travel trunk from the early 1900’s replaced the other end table. I just had a piece of glass cut to fit the top and it has been the perfect thing. If you want to learn more about cottage decorating click here to read an Ottawa Citizen article that I contributed to.

Antique trunk fitted with a glass top to use as a table

Photo credit: Melissa Kew Photography

And on the other side of the cottage living room.

Before picture of living room with design changes

We upgraded the wood pellet stove for a wood burning insert. Well worth the change both aesthetically and financially, as it has lowered our heating bills substantially in the winter.

The two pink swivel chairs were functionally perfect for the space. Even more so after I added the tv behind them, so now you can swivel to watch the fire or tv. With their threadbare pink fabric, they needed a makeover.  By raising them up a few inches (they were quite short) and reupholstering them in an exterior fabric they will be used and abused for many years.

log home living room with white slipcovered sofas

Photo credit: Melissa Kew Photography

New foam and a durable exterior fabric completely updated the window seats. The pillows are a combination of ones I have made, knitted or picked up at various shops.

Adding my own decor items, like the large clock above the mantel, makes it feel more like us. Since this picture was taken this clock has been switched out for an even larger metal industrial one. Antique books, candles and other decor items are displayed on the mantel itself.  You can’t quite see them in these pictures,  but I used images from a great desk calendar and put them in inexpensive frames. By stacking them on top of each other, it gives them a bit more presence on the wall.

Originally this floor lamp was gold plated and very dated. I painted it black and bought a new drum shade to give it a new lease on life.

Cottage living room with stone fireplace

Photo credit: Melissa Kew Photography

The cute little turquoise cabinet, a hand me down gift from a neighbour, got a fresh coat of paint. The swing chair lives here in the winter and in the summer it is enjoyed on the back deck.

Obviously, budget wise we didn’t do this all at the same time. Being one of our most used spaces, it was high on the priority list. I had a plan and as cash became available I just kept going down my list. That is really the key…to have a plan. You may find things as you go along that aren’t in the plan. That’s okay just as long as you have a good idea of where you are heading. That will also help you to avoid getting off track by spending more money then is necessary.

How can I help you design your living room?