Adding a three season sunroom

Hello everyone! It’s been awhile. I’m not sure about you, but for me, it’s been hard to get motivated lately. So in the interest of focusing on something else, besides Covid, I’m sharing my three season sunroom plans.

The dead of winter is really the ideal time to make exterior design plans. Like so many of us, I’ve been focusing on my home. So I’ve been playing with our backyard design for the last few months. And we’ve just taken the first step towards getting a functional and oh so pretty backyard.

Our bungalow model, has a small covered area at the back. As soon as we saw it, we pictured a three season sunroom.

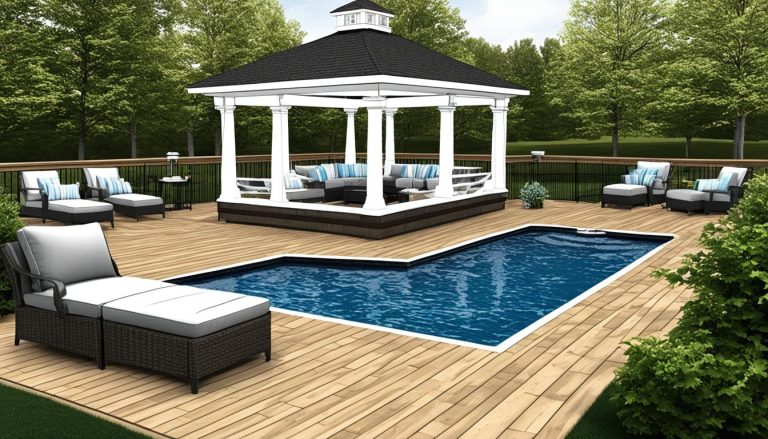
Here’s a couple of my 3D renderings showing what I’ve come up with so far.

Three season sunroom rendering
A bird’s eye view

It’s the area at the top left corner in the floor plan below. (Our house is actually the reverse of this plan. Click here to see more about our bungalow.) As you can see it’s very tiny. About 9′ x 9′. Just enough room to have a few chairs, maybe a couple of ottomans, and a small table.

Bungalow floor plan

Construction starts this spring! We’ll have it enclosed by adding a deck floor and then putting in Weatherwall windows and a door. I haven’t used these types of windows before but they are perfect for this application. They are clear heavy gauge vinyl that will spring back to shape if pushed on. The four section windows open by stacking up on themselves.

Below is an inspiration photo we saw when driving around town one day. Our windows won’t go to the floor though, as we will be putting some sort of siding at the bottom.

Inspiration photo of three season sunroom

Our existing windows, doors and roof are all black, so we will be keeping it harmonious and doing the same with the sunroom. With the tiny wall area in the sunroom, I’m leaning towards installing black horizontal siding inside and out. I haven’t completely decided on that yet, but I think it looks pretty darn good in my 3D renderings above.

Exterior bungalow
Front exterior of our bungalow

This is just the first phase of the backyard project. We are planning to add a hot tub, two level deck, fencing and a pergola over the next few years. Having a long term plan is crucial when doing any type of construction in stages. You can have a tiny peek of what I’m thinking in my renderings above. It’s a tiny yard, so I want to make it functional, pretty and very, very low maintenance.

Yet another reason to look ahead to spring!

Transforming previously loved furniture

I love a good furniture transformation. I find it so rewarding to transform previously loved furniture and make it my own.

It’s also very economical as typically the piece itself is either free or costs very little money, compared to a brand new piece. And the added extra bonus is that older furniture tends to be better made with more solid wood pieces than what you can buy currently.

This past summer, I went with my husband to the cottage dump and found this little tub chair. I immediately went to check it out as the tufting caught my attention. I also was also in need of a small scale chair for our new home.

Before vintage wicker and wood, upholstered tub chair
Before vintage wicker and wood upholstered tub chair

I made sure the wicker was in decent shape as it is hard to find someone to repair wicker. I’m sure you’ve seen this type of chair before as it’s a very popular design.

I plan to sand, prime and then paint it a soft old gray. I’ve selected this beautiful dark teal velvet to reupholster it with. And then accessorize it with a soft light gray faux fur pillow.

teal velvet and light gray faux fur

I am not sure where it will live in our new home, but perhaps the bedroom or the entry. Time will tell.

I’m really hoping it’s warm enough this week to prime and paint it in the garage. Fingers crossed.

Have you transformed previously loved furniture? I’ve done quite a few over the years. These are just a few of the chair ones that I’ve posted about.

I did this chair quite a few years ago, but it’s a favourite . It still lives nicely in my family room.

These two chairs were left behind by the previous cottage owner and I added a bit of height to them and reupholstered them for a completely new look.

My son and son-in-law redid these chairs that were my dad’s into extra living room seating for their home.

And more recently, I had the cushions on these wicker chairs redone to give them a fresh new look.

There are lots of ways to repurpose, reuse and recycle old furniture. Once my chair is all done, I’ll be sharing the reveal!

Modern and masculine bath

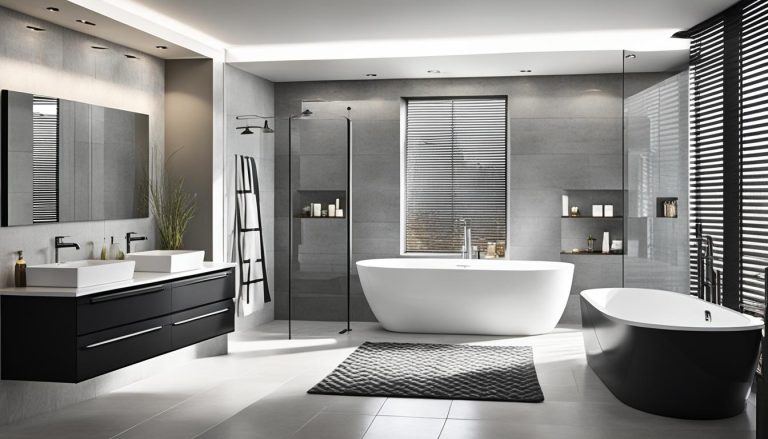
Hello, everyone! I’m finally back to my blog. I’ve been gone so long that WordPress has a completely new update…yikes. But enough about that, let’s get to some design inspiration. How about a modern, masculine, black and white bath?

This bathroom is actually in my son’s and his husband’s home. They came to me last summer when they had a serious leak which pushed the bathroom renovation up to the top of their priority list.

Justin, my son-in-law had already done the hard work and had a very good idea of what they wanted. So I just brought them samples, they quickly agreed on the final selection and once we had the contractor on board, we were ready to go.

This is what we were dealing with before.

Before- Modern,masculine bath
Before
Before modern bath renovation
Before

As you can see it is a tiny bathroom, or as they like to say it’s very quaint bathroom. And it’s their only full bathroom. So, we made sure that all items were on site and ready to install as soon as our contractor was ready to start. That way no downtime. Having them go on a vacation while it was being done was also fortunate. And they came home to a new, leak free bathroom.

Modern, masculine bath

They had recently replaced the toilet so that remained. The vanity is from Ikea and came with the sink and a bamboo counter. The bamboo wasn’t quite what we wanted so instead we picked up Ikea’s butcher block counter and had it cut to size by our contractor. Justin already had the shelf brackets so we just had the excess butcher block cut for the matching shelves.

Modern, masculine bath
Lighted mirror and shelf for modern, black and white bath

The lighted vanity mirror and the black faucet were found at a big box store.

Detail of shelf
Modern, masculine, black and white bath
Wood accents coordinate with wood floor
Modern, masculine, black and white bath

I love that the wood accents pick up on the wood floor and banister right outside the bath.

Black and white modern bath renovation
Black and white modern, masculine bath

The hexagon floor tile was something that they knew they wanted from the start. It looks amazing and has a little old world feel which is perfect for their almost 100 year old home.

Modern, masculine bath

The new tub has an updated square profile and the subway tiles are slightly oversized for another modern twist. Dark grout makes cleaning a little easier and the shower door’s barn door hardware picks up on both the grout and the floor.

A new window was installed since this was the ideal time to ensure it was watertight and energy efficient.

Vintage details in bath renovation
Vintage vent

I love the juxtaposition of the new black hexagon floor with the vintage vent. So much character!

Here’s a few more photos of the space.

Modern, masculine bath
Black and white, modern, masculine bath
Black faucet on Ikea sink and vanity
Modern, black and white masculine bath
After - Black and white, modern, masculine bath
Modern, masculine bath

We are all very happy with the outcome. How can we update your bathroom?

Serene ensuite bath

Serene master bath

My clients’ serene ensuite bath is finished! They are thrilled! No more sharing their children’s bathroom. 🙂 It’s perfectly spa like with soft blue grey walls, a luxurious soaking tub, large shower stall, carrera look tiles and a wood finish vanity.

Serene master bath
Serene master bath - vanity

Shower area

We kept the bathroom’s layout as it was functional and very budget friendly. The shower area is now square and fitted with a custom glass enclosure. As my clients are on a well and have hard water we chose a medium toned grey mosaic tile for the shower floor. It will help hide any future staining.

Serene master bath - shower

Large scale white subway tiles with a glossy hand finished quality to them line the shower walls. These tiles are stunners in real life and very easy to clean with their minimal grout lines. The water fall shower head completes the luxurious feel of this shower.

Serene master bath
Before - master bath shower
The shower area before

Tub area

The beautiful soaker tub now takes centre stage in the bathroom. It’s simple tulip like shape fills in the space and the floor mounted bath tub filler is like a little piece of sculpture in the room.

Serene master bath - freestanding tub
Serene master bath - tub area

And with that gorgeous view outside, who wouldn’t want to soak in here for hours?

Serene master bath - freestanding tub
Before - master bath tub area
The tub area before

Vanity area

Serene master bath

The vanity area is completely updated with a contemporary wood finished double sink vanity. Complete with quartz counters and square double sinks it is the perfect spot for sharing.

The carrera marble look porcelain tile flooring is the perfect blend of classic and low maintenance. Again the large scale rectangular shape means minimum grout lines to keep clean.

Before - master bath vanity area
The vanity area before

My clients originally had a toilet and bidet in this room. The decision to remove the bidet (which was only being used by the dog for his drinking bowl) allowed us to gain more space under the window. This allowed the toilet to move over slightly and give a little more breathing space at the vanity.

Serene master bath
Serene master bath - vanity

I am absolutely in love with the scale backsplash tile. We opted to do the whole wall for impact and to keep it soft and calm, we used a matching white grout. The fish scale pattern is perfect for a bathroom and it can be installed the opposite way to mimic a wave pattern.

Serene master bath - backsplash detail
Closeup of the backsplash tile

The round mirrors are contemporary and allow the backsplash to shine. And they coordinate with the rest of the bath’s chrome fixtures and finishes.

Serene master bath - backsplash detail
Serene master bath
Serene master bath

Are you in need of a bathroom renovation? You can check out another recent ensuite bath renovation here.

Give me a call and let’s start planning your dream bath.

How and where to place your tv

So, if you are like many other people you struggle with where and how to place your tv. The reality is most of us still have large televisions in our homes. Even if we spend a lot of time watching Netflix and Prime on our laptops. It can be a challenge to decide where it should go, living room? family room? den? And of course, where ever it goes, it dictates the furniture placement.

Do you put it centre stage in your room? But what about when it is off, and it becomes a big black hole in the room? Not typically what we all want as our room’s feature. Well for most women anyways, men can be fine with this. Lol

Sometimes, due to the size and shape of your family room or living room, it has to go above the fireplace. Not the ideal option, in my opinion and I struggled with this in our current new build. But sometimes, it is the only option.

I’ve listed a few methods here to help you disguise the big black box in the room.

  1. Hide it
    Well, at least part of the time. A media cabinet with either doors to close when not in use or one that is open with shelves, takes the focus off the television. This can also work for mounted tvs. A mounted cabinet can be built that allows for a decorative feature or artwork to show, when the doors are closed. And then there is these new tvs that look like art when they are not on. I just may be asking for one of these when our tv needs to be replaced. The Frame by Samsung is one that I have my eye on, pun intended 😉
  2. Make it part of a feature wall
    Aka ” If you can beat them, join them.”  Mount the television and then add a gallery wall of photos and art. By adding decorative pieces around it, the tv becomes part of the gallery.  I also like to use a dark media cabinet so that the tv and cabinet read as one piece.
  3. Blend it
    Paint or wallpaper the wall behind the tv in a dark colour. This makes such a huge difference. The big black box won’t stand out when it’s off and it’ll make for a better picture experience when it is on, as any glare will be reduced. This photo below is a client’s home showing how we wallpapered the tv wall in a dark colour to blend the tv and dark media cabinet. TV placement
  4. Embrace it
    By putting it above your fireplace, you make it part of the focal point. Make sure you get some guidelines from your television manufacturer since the type of tv and fireplace you have will dictate the specific clearances you’ll need. You’ll also have to keep in mind the distance between your sofa and tv, since optimal television viewing states that the tv be at eye level. This is not usually possible when placing it over the fireplace.

In our new build we have a very small living room on the main floor which will need to have a tv. Not a huge tv but a tv nonetheless. It also has only three walls, one that has a large, low window, one that has a fireplace with two windows on each side and then one long blank wall. So I went back and forth about whether or not to place the tv over the fireplace. Like seriously, back and forth, thinking about it at night, making a decision, then changing my mind.

We finally made the decision which I’ll share soon. I hope these suggestions help you in your quest to find the perfect place for your tv.