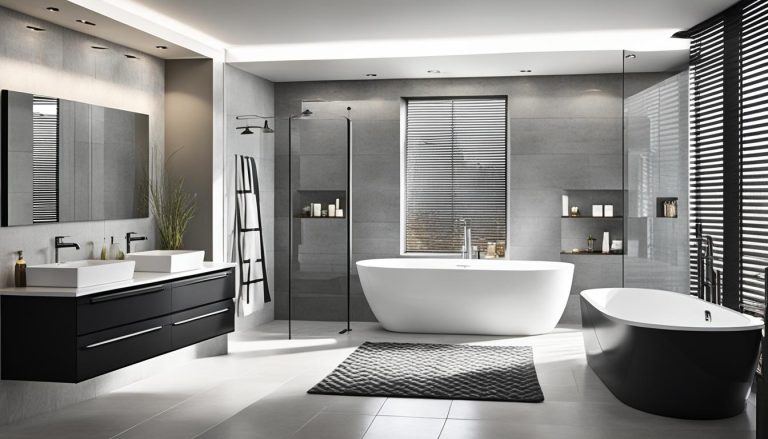
Sand and sea ensuite bath

Like a lot of you, we’ve been spending some quarantine time working on beautifying our home. This year, our log home’s ensuite bath made it to the top of the priority list. I have had this particular image of it in my design brain for a long time and finally, the sand and sea ensuite bath update has begun.

My husband actually started demoing it in the late fall as he was planning on doing most of the work himself. Which is great and horrible all at the same time. Great, in that we save some money on labour and can therefore spend more on products. Horrible, in that we’ve been living and sleeping in a construction zone for almost 4 months now. I’m so over all the dust and dirt.

Here’s the game plan, so I’m trying to keep my eyes on the prize.

Sand and sea ensuite bath design board

And she’s is coming along. Here’s the latest pictures I shared on FB and IG. The floor and wall tiles are all done and grouted. We’ve put some of the wood trim back up, with a little more to go once painting is done.

Sand and sea ensuite bath

A close up of the river rock shower floor.

Before

And just so you know what we have been living with for almost 10 years, below is the before of the bathroom. It’s not a bad layout and it certainly is not small so we were lucky to have these good bones. As you can see from the previous photos we’ve kept the same footprint and will just be replacing all the 30 year old fixtures.

Before - ensuite bath
The ensuite before circa 1992

What’s next

We are having some drywall repairs done this week and then we will be painting and setting up a time for the plumber to install the free standing tub, the toilet, sinks and shower fixtures. I CAN’T WAIT!

We will also have the glass for the shower enclosure measured and manufactured. We did want to reuse the existing glass but sadly a piece did not survive the removal. Not too sure how long that will take, but with all the covid delays, I’m thinking using the shower will still be awhile away.

I’m also waiting for the light fixtures to come in, hopefully this week or next.

I’ll be sharing more details on how this design evolved and why I made some of the selections I did, in future posts. And I have a little project I want to do as an accessory for the tub. Stay tuned….

Also if you would like to read more about our log home renovations that we have been doing since we purchased it 10 years ago, you can click these links below:

Log cottage kitchen transformation

Designing and furnishing a sunroom

Designing a modern cottage bath on budget

Log cottage living room on plan and budget

Log cottage dining room update

Log cottage published!

Serene ensuite bath

Serene master bath

My clients’ serene ensuite bath is finished! They are thrilled! No more sharing their children’s bathroom. 🙂 It’s perfectly spa like with soft blue grey walls, a luxurious soaking tub, large shower stall, carrera look tiles and a wood finish vanity.

Serene master bath
Serene master bath - vanity

Shower area

We kept the bathroom’s layout as it was functional and very budget friendly. The shower area is now square and fitted with a custom glass enclosure. As my clients are on a well and have hard water we chose a medium toned grey mosaic tile for the shower floor. It will help hide any future staining.

Serene master bath - shower

Large scale white subway tiles with a glossy hand finished quality to them line the shower walls. These tiles are stunners in real life and very easy to clean with their minimal grout lines. The water fall shower head completes the luxurious feel of this shower.

Serene master bath
Before - master bath shower
The shower area before

Tub area

The beautiful soaker tub now takes centre stage in the bathroom. It’s simple tulip like shape fills in the space and the floor mounted bath tub filler is like a little piece of sculpture in the room.

Serene master bath - freestanding tub
Serene master bath - tub area

And with that gorgeous view outside, who wouldn’t want to soak in here for hours?

Serene master bath - freestanding tub
Before - master bath tub area
The tub area before

Vanity area

Serene master bath

The vanity area is completely updated with a contemporary wood finished double sink vanity. Complete with quartz counters and square double sinks it is the perfect spot for sharing.

The carrera marble look porcelain tile flooring is the perfect blend of classic and low maintenance. Again the large scale rectangular shape means minimum grout lines to keep clean.

Before - master bath vanity area
The vanity area before

My clients originally had a toilet and bidet in this room. The decision to remove the bidet (which was only being used by the dog for his drinking bowl) allowed us to gain more space under the window. This allowed the toilet to move over slightly and give a little more breathing space at the vanity.

Serene master bath
Serene master bath - vanity

I am absolutely in love with the scale backsplash tile. We opted to do the whole wall for impact and to keep it soft and calm, we used a matching white grout. The fish scale pattern is perfect for a bathroom and it can be installed the opposite way to mimic a wave pattern.

Serene master bath - backsplash detail
Closeup of the backsplash tile

The round mirrors are contemporary and allow the backsplash to shine. And they coordinate with the rest of the bath’s chrome fixtures and finishes.

Serene master bath - backsplash detail
Serene master bath
Serene master bath

Are you in need of a bathroom renovation? You can check out another recent ensuite bath renovation here.

Give me a call and let’s start planning your dream bath.

White, clean and calm ensuite bath

Do you need a bathroom renovation that will make your house more serene, more practically organized and more like you? Well, keep reading to find out how the process works and just what can be achieved in your home.

This bathroom transformation went from dark, cluttered and drab to white, clean and serene. Isn’t she pretty and practical now?

Calm and serene master bath

These clients had a wish list that included:

  • two sinks,
  • lots more storage,
  • larger shower,
  • removing the tub,
  • better lighting,
  • proper venting, and
  • white and serene bath.

This ensuite  bath had no personality and obviously was dismal at even providing proper storage. It had only one sink in a crowded vanity, a window and tub where my client had envisioned the shower going, an awkward semi-circular shower enclosure and virtually no ventilation or proper lighting. It is definitely not possible to get ready to take on the day here or for that matter relax at the end of the day?

Before – master bath

You can see the semi-circular shower in the mirror opposite the vanity and behind the door. And the built in tub that was never used.

Before – master bath

I did up three different plans and after consulting with me and their contractor, the clients decided on this plan.

burnsopt3layout

burnsopt3

Originally we were going to move the toilet and the door but moving a toilet is an expensive option, so in the end we left both the toilet and the door where it was.

Then I did up two mood boards which shows tile, lighting and fixture selections. They went with Option 1. burns-master-bath-001

Here’s a closer look at the tile selections.

Master bath tile selection

The large scale shower wall tile looks like glass but it is actually porcelain and it is a breeze to clean. As per the norm, some items were changed from the moldboard to creation. The vanity was a great find and you’ll see why as you keep reading. The lighting was also changed to discreet pot lights where needed. We felt there was enough going on in the vanity area so this kept the area cleaner.

Where there was cramped, dark and non functioning, there is now this clean, serene, spa like space.

Calm and serene master bath So, what did we do exactly? We moved the vanity from it’s existing place at the right of the door to where the built in tub was. That way we got enough room to put two sinks and that enabled us to place the shower where the vanity had been. Originally, the clients wanted to swap the tub for the shower, but then the window was going to be partially in the shower enclosure. It could have been done, but this was a more cost effective and worry free solution. Moving the shower where the vanity was allowed for a much larger area and since it is all glass it feels very open when you are entering into the bathroom.

My clients also wanted a large inset shower shelf but since the main, long wall was an exterior wall, we couldn’t put a shelf there. So, instead we placed two smaller inset shower shelves, one on each side of the shower tower and it worked perfectly.

Custom shower with two inset shelves

Inset shower shelf

The inset shelf tile is the same as the shower floor and it was also used as a vanity backsplash, for continuity.

Custom shower with two inset shelves

Closeup of vanity area

Clean and serene master bath

The cool thing about this vanity is that the bottom toe kick is actually a secret drawer. Therefore, it has even more storage than you expect.

Clean and serene master bath

And those upper mirrored cabinets, well they cantilever up for easy access to even more storage.

Clean and serene master bath

My client, picked up this adorable teak stool that she uses in the shower, when needed.

Clean and serene master bath

How much nicer is it to get ready in this dream of a bath? If you need the answer to that question, give me a call and we can start working on your dream bath.

Lisa

ENSUITE BATH RENOVATION – FROM DARK AND DRAB TO BRIGHT AND PRETTY

BEFORE

img_9684edited img_9680

AFTER

yellow_greymasterbathedited

yellow_greymasteredited

detailyellow_greymasterbath-3edited


This bath was dramatically transformed from dark and drab to bright and pretty. The walk in shower was removed and a free standing tub was put in it’s place. It was made bright by using porcelain tile that mimics carrera marble in feel and durability. A soft pearlescent hexagon accent tile was used to reflect light and add a touch of sparkle to the tub area. The vanity was repurposed with a new quartz countertop, sink and faucet.

From dark and drab to bright and pretty

Well, I can definitely smell fall in the air.  Makes me want to get all my cosy sweaters, leggings, tall boots and chai pumpkin tea out. It really is my favourite season, cool, sunny and not too hot.

As promised I thought I’d catch you up on some design projects that I worked on this past winter/spring.  And this ensuite bath renovation definitely brings to mind a fresh, bright, spring day.

Quite a bit of work has been done on this client’s home, as the previous owner used a wheelchair and there was some retrofitting that needed to be done for my client.  High up on the wish list, was her dark, brown and dreary ensuite bathroom.

Here’s the befores and I apologize for the absolutely terrible before pics. In my defence, it’s a small bath so it is very hard to get some good pictures but I think I accidentally deleted a few that actually were better than theses (shakes head).

img_9684edited img_9680

My client explained that she really wanted a white, clean, spare, spa bath with a freestanding tub and no shower (there’s one in the basement).

So, first up was removing the large brown walk-in shower.  I gave my client the exact measurements she’d need for a tub that would fit into small alcove (where the shower had been) and she was off shopping.  It was very important that she tried out the tub herself and made sure it was comfortable for her, tubs are like mattresses and seating, everyone fits in them differently.

And happily, she found the perfect one, modern, clean, oval and exactly the right size for our space.

c-vessovasquecontemporain-20150326-132034-0

Vanico Maronyx – Vesso

Isn’t she pretty?

Now it was time to find tiles. She loved the look of marble but with budget being an issue, I found some marble lookalike, large scale porcelain tile which fit the look and budget perfectly. We used them on the floor and then ran them up the wall about a third of the way, but just around the tub.

img_0405-2edited

Ceragres Anima & Onix Nature

When I came upon this pretty matte and  iridescence mini hexagon tile border, I had an aha moment. However, the large scale tile and the border tile were different thicknesses, but after adding in the chair rail moulding tile and pencil tile, it will never be noticed.

Due to budget constraints we decided to keep the existing white vanity.

4600_2400_1080

Caesarstone Organic white quartz

But upgraded to a new Caesarstone’s Organic White quartz countertop (above). Together with a simple white square undermount sink, shiny new Moen faucets and hardware you’d never guess it was the same cabinet. Feminine and sparkly!

ts42114

Moen Weymouth

We added the matching two handle tub filer from Moen, which really makes a statement in the small bath.

s22105

Moen Weymouth

Again, excuse the photos, I haven’t had it professionally photographed yet, or even photographed by me properly, but here’s a few iPhone pics of the after.  And yes we were still waiting for the new handles to be installed in this pic as well as for a small shelf above the toilet.

White. grey and yellow master bath

White, grey and yellow master bath tub

White, grey and yellow master bath detail

Quite a difference from the previous space, wouldn’t you say?  Bright and pretty, it’s the perfect spot to enjoy a nice soak.

Lisa