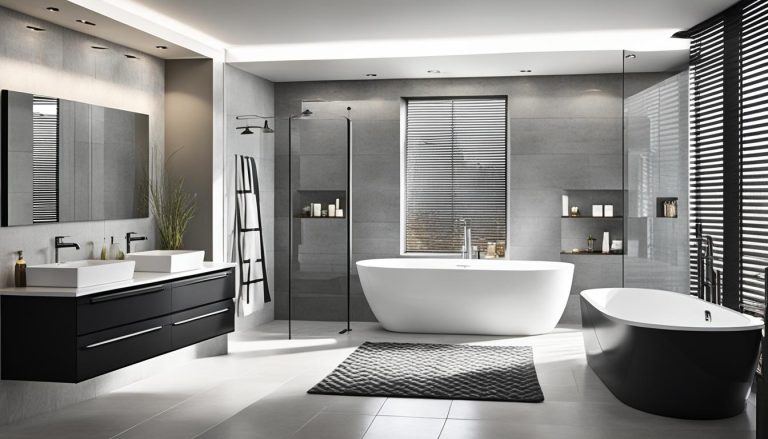
White, clean and calm ensuite bath

Do you need a bathroom renovation that will make your house more serene, more practically organized and more like you? Well, keep reading to find out how the process works and just what can be achieved in your home.

This bathroom transformation went from dark, cluttered and drab to white, clean and serene. Isn’t she pretty and practical now?

Calm and serene master bath

These clients had a wish list that included:

  • two sinks,
  • lots more storage,
  • larger shower,
  • removing the tub,
  • better lighting,
  • proper venting, and
  • white and serene bath.

This ensuite  bath had no personality and obviously was dismal at even providing proper storage. It had only one sink in a crowded vanity, a window and tub where my client had envisioned the shower going, an awkward semi-circular shower enclosure and virtually no ventilation or proper lighting. It is definitely not possible to get ready to take on the day here or for that matter relax at the end of the day?

Before – master bath

You can see the semi-circular shower in the mirror opposite the vanity and behind the door. And the built in tub that was never used.

Before – master bath

I did up three different plans and after consulting with me and their contractor, the clients decided on this plan.

burnsopt3layout

burnsopt3

Originally we were going to move the toilet and the door but moving a toilet is an expensive option, so in the end we left both the toilet and the door where it was.

Then I did up two mood boards which shows tile, lighting and fixture selections. They went with Option 1. burns-master-bath-001

Here’s a closer look at the tile selections.

Master bath tile selection

The large scale shower wall tile looks like glass but it is actually porcelain and it is a breeze to clean. As per the norm, some items were changed from the moldboard to creation. The vanity was a great find and you’ll see why as you keep reading. The lighting was also changed to discreet pot lights where needed. We felt there was enough going on in the vanity area so this kept the area cleaner.

Where there was cramped, dark and non functioning, there is now this clean, serene, spa like space.

Calm and serene master bath So, what did we do exactly? We moved the vanity from it’s existing place at the right of the door to where the built in tub was. That way we got enough room to put two sinks and that enabled us to place the shower where the vanity had been. Originally, the clients wanted to swap the tub for the shower, but then the window was going to be partially in the shower enclosure. It could have been done, but this was a more cost effective and worry free solution. Moving the shower where the vanity was allowed for a much larger area and since it is all glass it feels very open when you are entering into the bathroom.

My clients also wanted a large inset shower shelf but since the main, long wall was an exterior wall, we couldn’t put a shelf there. So, instead we placed two smaller inset shower shelves, one on each side of the shower tower and it worked perfectly.

Custom shower with two inset shelves

Inset shower shelf

The inset shelf tile is the same as the shower floor and it was also used as a vanity backsplash, for continuity.

Custom shower with two inset shelves

Closeup of vanity area

Clean and serene master bath

The cool thing about this vanity is that the bottom toe kick is actually a secret drawer. Therefore, it has even more storage than you expect.

Clean and serene master bath

And those upper mirrored cabinets, well they cantilever up for easy access to even more storage.

Clean and serene master bath

My client, picked up this adorable teak stool that she uses in the shower, when needed.

Clean and serene master bath

How much nicer is it to get ready in this dream of a bath? If you need the answer to that question, give me a call and we can start working on your dream bath.

Lisa

Classic, warm, beachy home

Classic, warm and beachy, these were the adjectives my client used when describing to me how she wanted her home’s living room/dining room and kitchen to feel. She also wanted to have lots of storage in all three rooms. And we achieved just that. I visited her last week and took some photos to show just how great the transformation turned out.

This is the view from the entry now.

After – beachy living and dining room

The befores:

before living room before living room

I did up a couple of mood boards and sourced products for her so that she could follow the plan along at her own pace as her time and budget allowed. She also has an extremely handy father who did alot of the hands on work. Trades people were hired for the jobs that were not DIY and I think this makeover shows just how much you can do on a fairly strict budget.

So obviously this was a fairly extensive makeover, new hardwood floors were installed in a medium tone brown to keep the look classic and timeless. The dining table was an existing one that her father had made so it was incorporated into the space.  The sofa was custom made and the case goods were picked up from big box stores.

I suggested that she use some of her own family pictures in the 4 large frames and they have turned out perfectly. She already has plans to rotate in some newer pictures. The drapery was ready made and adds some graphic pattern to the palette.

fullsizerender-43

The bird and octopus artwork was purchased by my client on her yearly trips to Prince Edward County and they are the perfect compliment to the space.

after - beachy living room

after - living room

fullsizerender-49

fullsizerender-46

Now onto the kitchen. Here’s what it looks like now.

After - warm beachy kitchen

And here’s the befores:

Before - kitchen before - kitchen Before - kitchen

We continued with the same drapery as the living room and dining room as the windows are literally right beside each other. The hardwood floor was continued throughout the kitchen as well to keep the flow from room to room. The existing dark wood cabinetry was painted out to match the new pantry and open shelving.

An antique feeling dark wood table was added to tie in with the dark wood floors and the chairs were my client’s grandmothers, which serendipiously match the table perfectly.  I selected a clear glass pendant to keep the sight lines open to the new backyard deck, as well as a glass and gold flush mount fixture (not shown) for the working area of the kitchen. Under cabinet lighting was also added during the renovation.

The bronze/gold Brizo Talo faucet sparkles like a piece of jewelry on the Caesarstone Quartz white counter and the backsplash is actually tile that looks so much like barn wood, you have to touch it to believe it.

After - warm and beachy kitchen

After - kitchen pantry and open shelving area

These extra cabinets added much needed storage to the space challenged kitchen and a little touch of display area, which can be changed out to a bar or appetizer area when guests are expected.

After - kitchen wallpaper and mirrors

This long, long wall opposite the stove, was treated to some softly textured wallpaper that is wipeable and adds a little extra pattern to the kitchen. My client found these adorable mirror spheres that hide the unused and unsightly phone outlet.

Kitchen faucet - Brizo Talo

The Brizo Talo faucet.

After - kitchen open shelving

Some added display area that also showcases the backsplash.

fullsizerender-58

My client is thrilled with her home and it’s new look. She says when she gets home she breathes a happy sigh and settles in for some R & R. Which just makes me smile!

Lisa


Entrance and wallpaper selection

Way back a few months ago, I was posting on IG and FB a few of the wallpaper options that I was looking at for my entryway.  I had been going back and forth on what exactly I wanted.  I originally was looking at navy and white and I definitely wanted some sort of natural theme, leaves, flowers, trees…  However, since we are thinking of selling at some point in the future, I wanted something that appealed to most people and wasn’t too out there. Then I decided to do the One Room Challenge, which of course, totally side railed me on the wallpaper selection.

But I digress, and here were the contenders:

Wallpaper choices/grey/black & white

So you can definitely see my nature theme going on above. Each one has it’s pluses and minuses. Top left is modern and the grey has a slight metallic tone so it’s also a little more formal.  Top right is soft, calm and has a watercolour feel in person. Bottom left has a linen texture and is again calm and neutral. Bottom right is similar to a block print and has a casual Scandinavian feel.

So to let you see where I’m thinking of using one of these papers. Here’s a few befores:

When we first moved in:

Entry before

After I stencilled and painted the interior doors a charcoal/black.

Entry after with stencil Entry after with stencil

I did love the stencil but then I had the house painted just before Christmas and the stencil was painted over. So back to the drawing board or in this case, the wallpaper store. Since I had already done a stencil I wanted something different so wallpaper won out.

This is how the entry looked after a fresh coat of Benjamin Moore’s Picket Fence. Fresh and clean but just a little dull.

Entryafterpaint

And which paper was the winner, you ask?

fullsizerender-6

I’m a sucker for trees and leaves and I thought this one had the touch of greige/taupe that would work with the existing beige/taupe fixtures.

I’ll be posting the reveal later this week.

Lisa

Quick cottage refresh and award winning kitchens

How is your Spring going? Lots and lots of rain here, really hoping that our late spring/summer improves soon. We’ve been busy recovering from the flood at our cottage and celebrating our daughter’s upcoming wedding by having her bridal shower this past weekend. It was a lot of fun and I’ll be sharing some pictures of that later this week or early next week.

fresh and bright country cottage shelf detail Photography credit: Melissa Kew Photography


Today, I actually have a few links to share. CDECA (The Canadian Decorators’ Association) just published their post on the 6 award winning kitchens for 2017. I’m happy to be included in this amazing group of designers/decorators. Click on the picture above to see all the winning kitchens.

And if you are looking for a few tips on how to do a quick cottage spring refresh, check out the article that I contributed to in the online magazine, More.

Happy Wednesday and here’s to some more sun!

Lisa


A bright and fresh country kitchen – CDECA Silver award winner

Not a very humble title but I’m a little stoked to have my bright and fresh country kitchen win the Silver award for CDECA’s Decorating and Design Awards.

I thought I’d share the Youtube video showcasing my cottage kitchen.

Very exciting for me! And I’d like to say a big congratulations to all the 2017 winners.

Lisa