If you’re looking to add a touch of charm and character to your kitchen, a chalk-painted hutch might be just what you need. Transforming an old hutch into a stunning centerpiece is not only a fun DIY project but also a practical way to create extra storage space and free up your countertops.
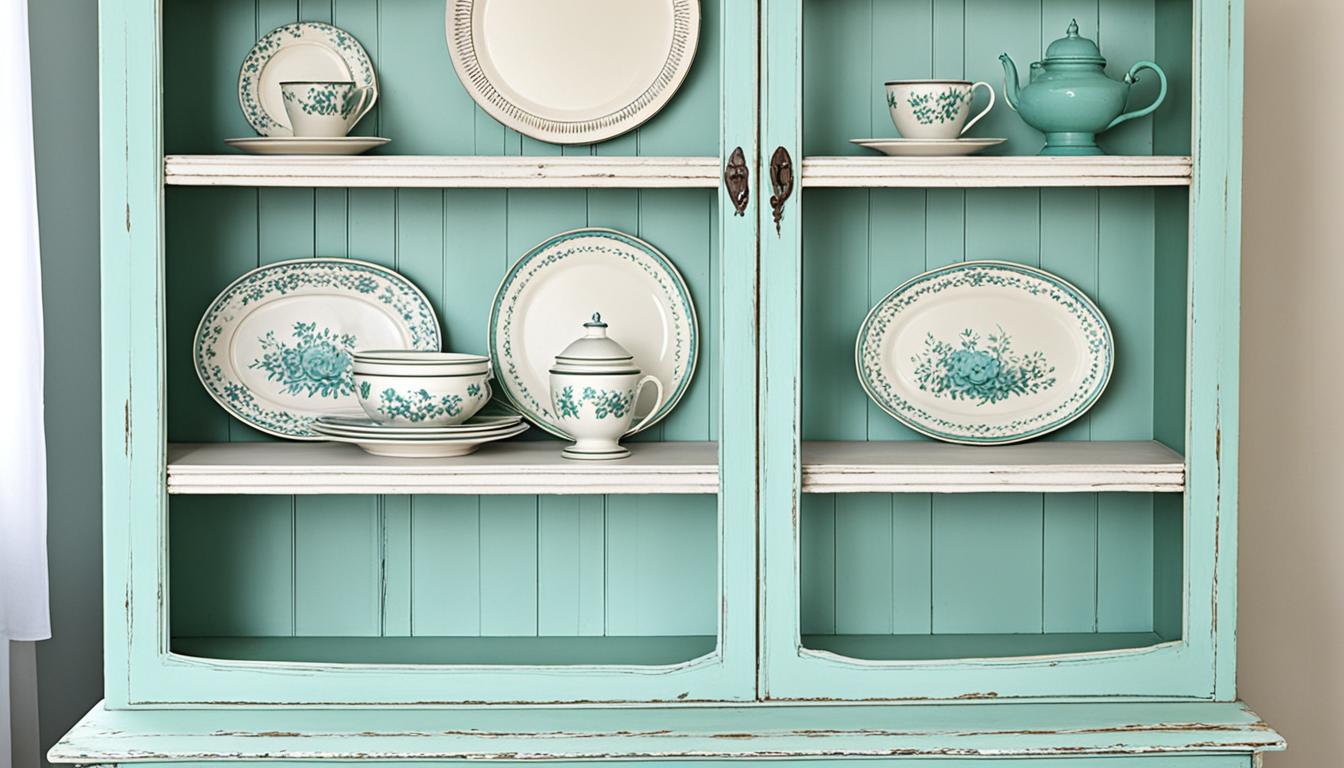
One of our favorite hutch makeovers involved using Annie Sloan Chalk Paint. We carefully selected a custom blue color for the main part and Graphite for the top, creating a beautiful contrast. To achieve a distressed look, we applied the paint with quick strokes, allowing parts of the wood to peek through. We also replaced the hardware with black iron pieces, adding a touch of elegance to the finished piece.
This transformed hutch now serves as the focal point of our kitchen, providing both functionality and style. Its unique design and storage capabilities make it a standout addition to any home.
In this article, we’ll explore various ideas and techniques for chalk-painted hutch makeovers, provide a step-by-step tutorial, and share inspiring examples of chalk-painted hutch and china cabinets. Whether you’re a seasoned DIY enthusiast or a beginner looking to try your hand at furniture transformation, you’re sure to find valuable tips and inspiration here.
Chalk Paint Furniture Ideas
Chalk painted furniture has been a popular trend for years, and there is no shortage of inspiration when it comes to transforming your hutch or china cabinet. Platforms like Pinterest are filled with countless ideas and examples of beautifully painted furniture makeovers. From farmhouse to shabby chic, mid-century modern to French provincial, the possibilities are endless.
When it comes to chalk paint techniques for hutch transformations, there are various approaches you can explore. Different brands of chalk paint, such as Annie Sloan and DIY Paint, offer a wide range of colors and finishes to suit your style. You can experiment with distressing techniques to achieve a worn and weathered look or add stenciled designs for a touch of personalization. For a unique twist, consider using glass shelves or chicken wire in the doors to create an eye-catching display.
Here is a curated selection of chalk painted hutch and china cabinet ideas to fuel your creativity:
- A farmhouse-inspired hutch painted in a soft white color, distressed for a rustic look, and adorned with vintage-style hardware.
- A shabby chic hutch featuring a combination of pastel hues, lightly distressed edges, and delicate floral stenciling.
- A mid-century modern hutch in a bold and vibrant color like teal or mustard yellow, with sleek lines and metallic accents.
- A French provincial hutch with an elegant antique white finish, intricate detailing, and gilded hardware.
Remember, chalk paint offers endless possibilities for transforming your furniture. Let your creativity flow and discover your own unique style. Don’t be afraid to mix and match techniques, colors, and finishes to achieve the perfect look for your hutch makeover.
“Chalk paint allows you to breathe new life into old furniture and truly make it your own.” – DIY Paint Enthusiast
Whether you’re a seasoned DIYer or a beginner, exploring chalk paint furniture ideas can be a fun and rewarding experience. Take inspiration from the examples shared here and let your imagination guide you on your hutch transformation journey.
Chalk Paint Furniture Ideas Inspiration
| Style | Description | Colors | Techniques |
|---|---|---|---|
| Farmhouse | A rustic and charming look inspired by country living. | Soft white, cream, pale blue | Distressing, vintage hardware |
| Shabby Chic | Delicate and feminine with a vintage touch. | Pastel pink, mint green, lavender | Light distressing, floral stenciling |
| Mid-Century Modern | Sleek and retro-inspired with clean lines. | Teal, mustard yellow, orange | Solid color, metallic accents |
| French Provincial | Elegant and ornate, reminiscent of French countryside. | Antique white, pale gray, gold | Intricate detailing, gilded hardware |

Chalk Paint Hutch Tutorial
If you’re looking to give your hutch a fresh, new look, this chalk paint tutorial is for you. With just a little bit of paint and some creativity, you can transform an old, outdated hutch into a stunning piece of furniture that will be the centerpiece of your space.
The process starts with finding the perfect hutch. Thrift stores and flea markets are great places to look for unique pieces at affordable prices. Once you have your hutch, it’s time to gather your supplies and get started.
Gather Your Supplies
- Chalk paint in your desired color
- Paintbrushes
- Sandpaper
- Stencil
- New pulls and handles
- Fabric and matte Mod Podge for lining the drawers
Before you begin painting, make sure to properly prepare the surface of your hutch. Remove any hardware or knobs and sand the surface lightly to create a smooth base for the paint.
Start by applying a coat of white paint as a primer. This will help the color of your chalk paint to really pop. Once the primer is dry, apply a coat of your chosen chalk paint color. For a distressed look, you can use sandpaper to lightly sand certain areas, giving the hutch a worn appearance.
To add a decorative element, consider using a stencil on the lower doors. This can be a great way to incorporate a unique design or pattern into your hutch. Secure the stencil in place with painter’s tape and carefully apply the paint to create your desired design.
Next, replace the hardware with new pulls and handles. This simple change can make a big difference in the overall look of your hutch.
Finally, line the drawers with fabric using matte Mod Podge. This not only adds a personal touch but also helps to protect the interior of the drawers.
Once all the painting and finishing touches are complete, allow the hutch to fully dry before placing any items inside. This will ensure that the paint cures properly and prevents any smudging or damage.
Now that you’ve successfully transformed your hutch with chalk paint, it’s important to know how to care for painted furniture. Avoid using harsh cleaning chemicals, as they can damage the finish. Instead, use a soft cloth and mild soap to gently clean the surface. Regularly dusting the hutch will also help to maintain its appearance.
With the knowledge and skills you’ve gained from this tutorial, you can now confidently paint and revive other furniture pieces in your home. The possibilities are endless, and you’ll find that painting furniture not only gives it a fresh update but also allows you to express your personal style.
Chalk Painted Hutch and China Cabinet Ideas
Looking for inspiration to transform your hutch or china cabinet? Look no further! We have gathered a collection of stunning chalk-painted hutch and china cabinet ideas to ignite your creativity.
From farmhouse charm to mid-century modern vibes, these examples showcase the versatility of chalk paint. The color options are endless – from classic whites and distressed finishes to bold hues that make a statement. Each piece tells a unique story, painted by different individuals who infused their personal touch into the transformation.
Whether you’re seeking inspiration for a vintage hutch or a modern china cabinet, these examples cover it all. Explore the intricate hand-painted details, creative stencils, and unique hardware choices that elevate these pieces to works of art.
Don’t forget to browse platforms like Pinterest for more chalk paint hutch inspiration. The key is to unleash your imagination and find the perfect ideas to revamp your own hutch or china cabinet, turning it into a stylish focal point that reflects your personal style.